Outfitting, Part 4: Our Most Productive Week Yet!

To be honest, I never thought a week like this would come. We had experienced so many obstacles and setbacks that outfitting the RV was feeling like a big construction project! I had memories of everything we endured getting the house ready to sell, and now there we were, less than two months later, experiencing it all over again in the trailer. But, I'm a firm believer in the Universe's attempts to achieve some sort of homeostasis, so if there is a period where lots is going wrong, eventually things will start to go right.
This notion didn't stop me from feeling extremely overwhelmed going into the last week of November. Not only did we have big plans for renovations, but we also had two days of RV driving school to kick off the week. Talk about stress! That whole experience is a blog post on its own, but it's worth noting here for a couple of reasons.
Immediately upon arriving to Driving School, we had our instructor check our hitch. We were convinced it was installed incorrectly, due to mounting evidence on our maiden voyage (tough handling, insane amounts of raising and lowering the tongue jack whenever we hitched/unhitched, the bouncing on I-81, to name a few). Turns out, we were right. Now before we give anyone heart palpitations, the hitch was perfectly safe. It was just installed way too high on our truck. It was also missing some spacers, which was causing all the bumping and bouncing. This was an issue from day 1, when Trailers of the East Coast forgot they said they'd have someone install our hitch, and so they grabbed the first tech who was free. That tech had issues installing it. We all knew it. We just didn't know how much those issues would affect our towing. Turns out, quite a bit! It's not something I'll get into the details of in this blog, mainly because we think TOTEC overall does a fantastic job...and they read these posts (hi guys!)...but it's worth mentioning here because it's SO important to make sure your hitch is installed correctly. Even if it's not a safety hazard, it can lead to other issues like hitch damage or even just poor handling of the trailer. We'll never know if we could have avoided our ditch sitch had the hitch been installed properly, but that was the day we had the most trouble while towing. Due diligence is key when it comes to towing. We're learning that more and more.
The main point in bringing this up is that, we were able to get our hitch reinstalled correctly, and this was one of the things we knew we needed to do before hitting the road. It falls under the task that we call "damage control." This includes everything we can do to fix the damage we incurred during our ditch sitch. (Thinking I'll call it that from now on. Has a nice ring to it, don't you think?)
The other reason I wanted to bring up Driving School was that it went so far beyond towing lessons, to the point that our instructor also figured out how to remove our LED ceiling light covers! That means later in the week, we finally de-bugged all our lights. Never again will we be lackadaisical about putting our patio screen down, especially at night, in a field!
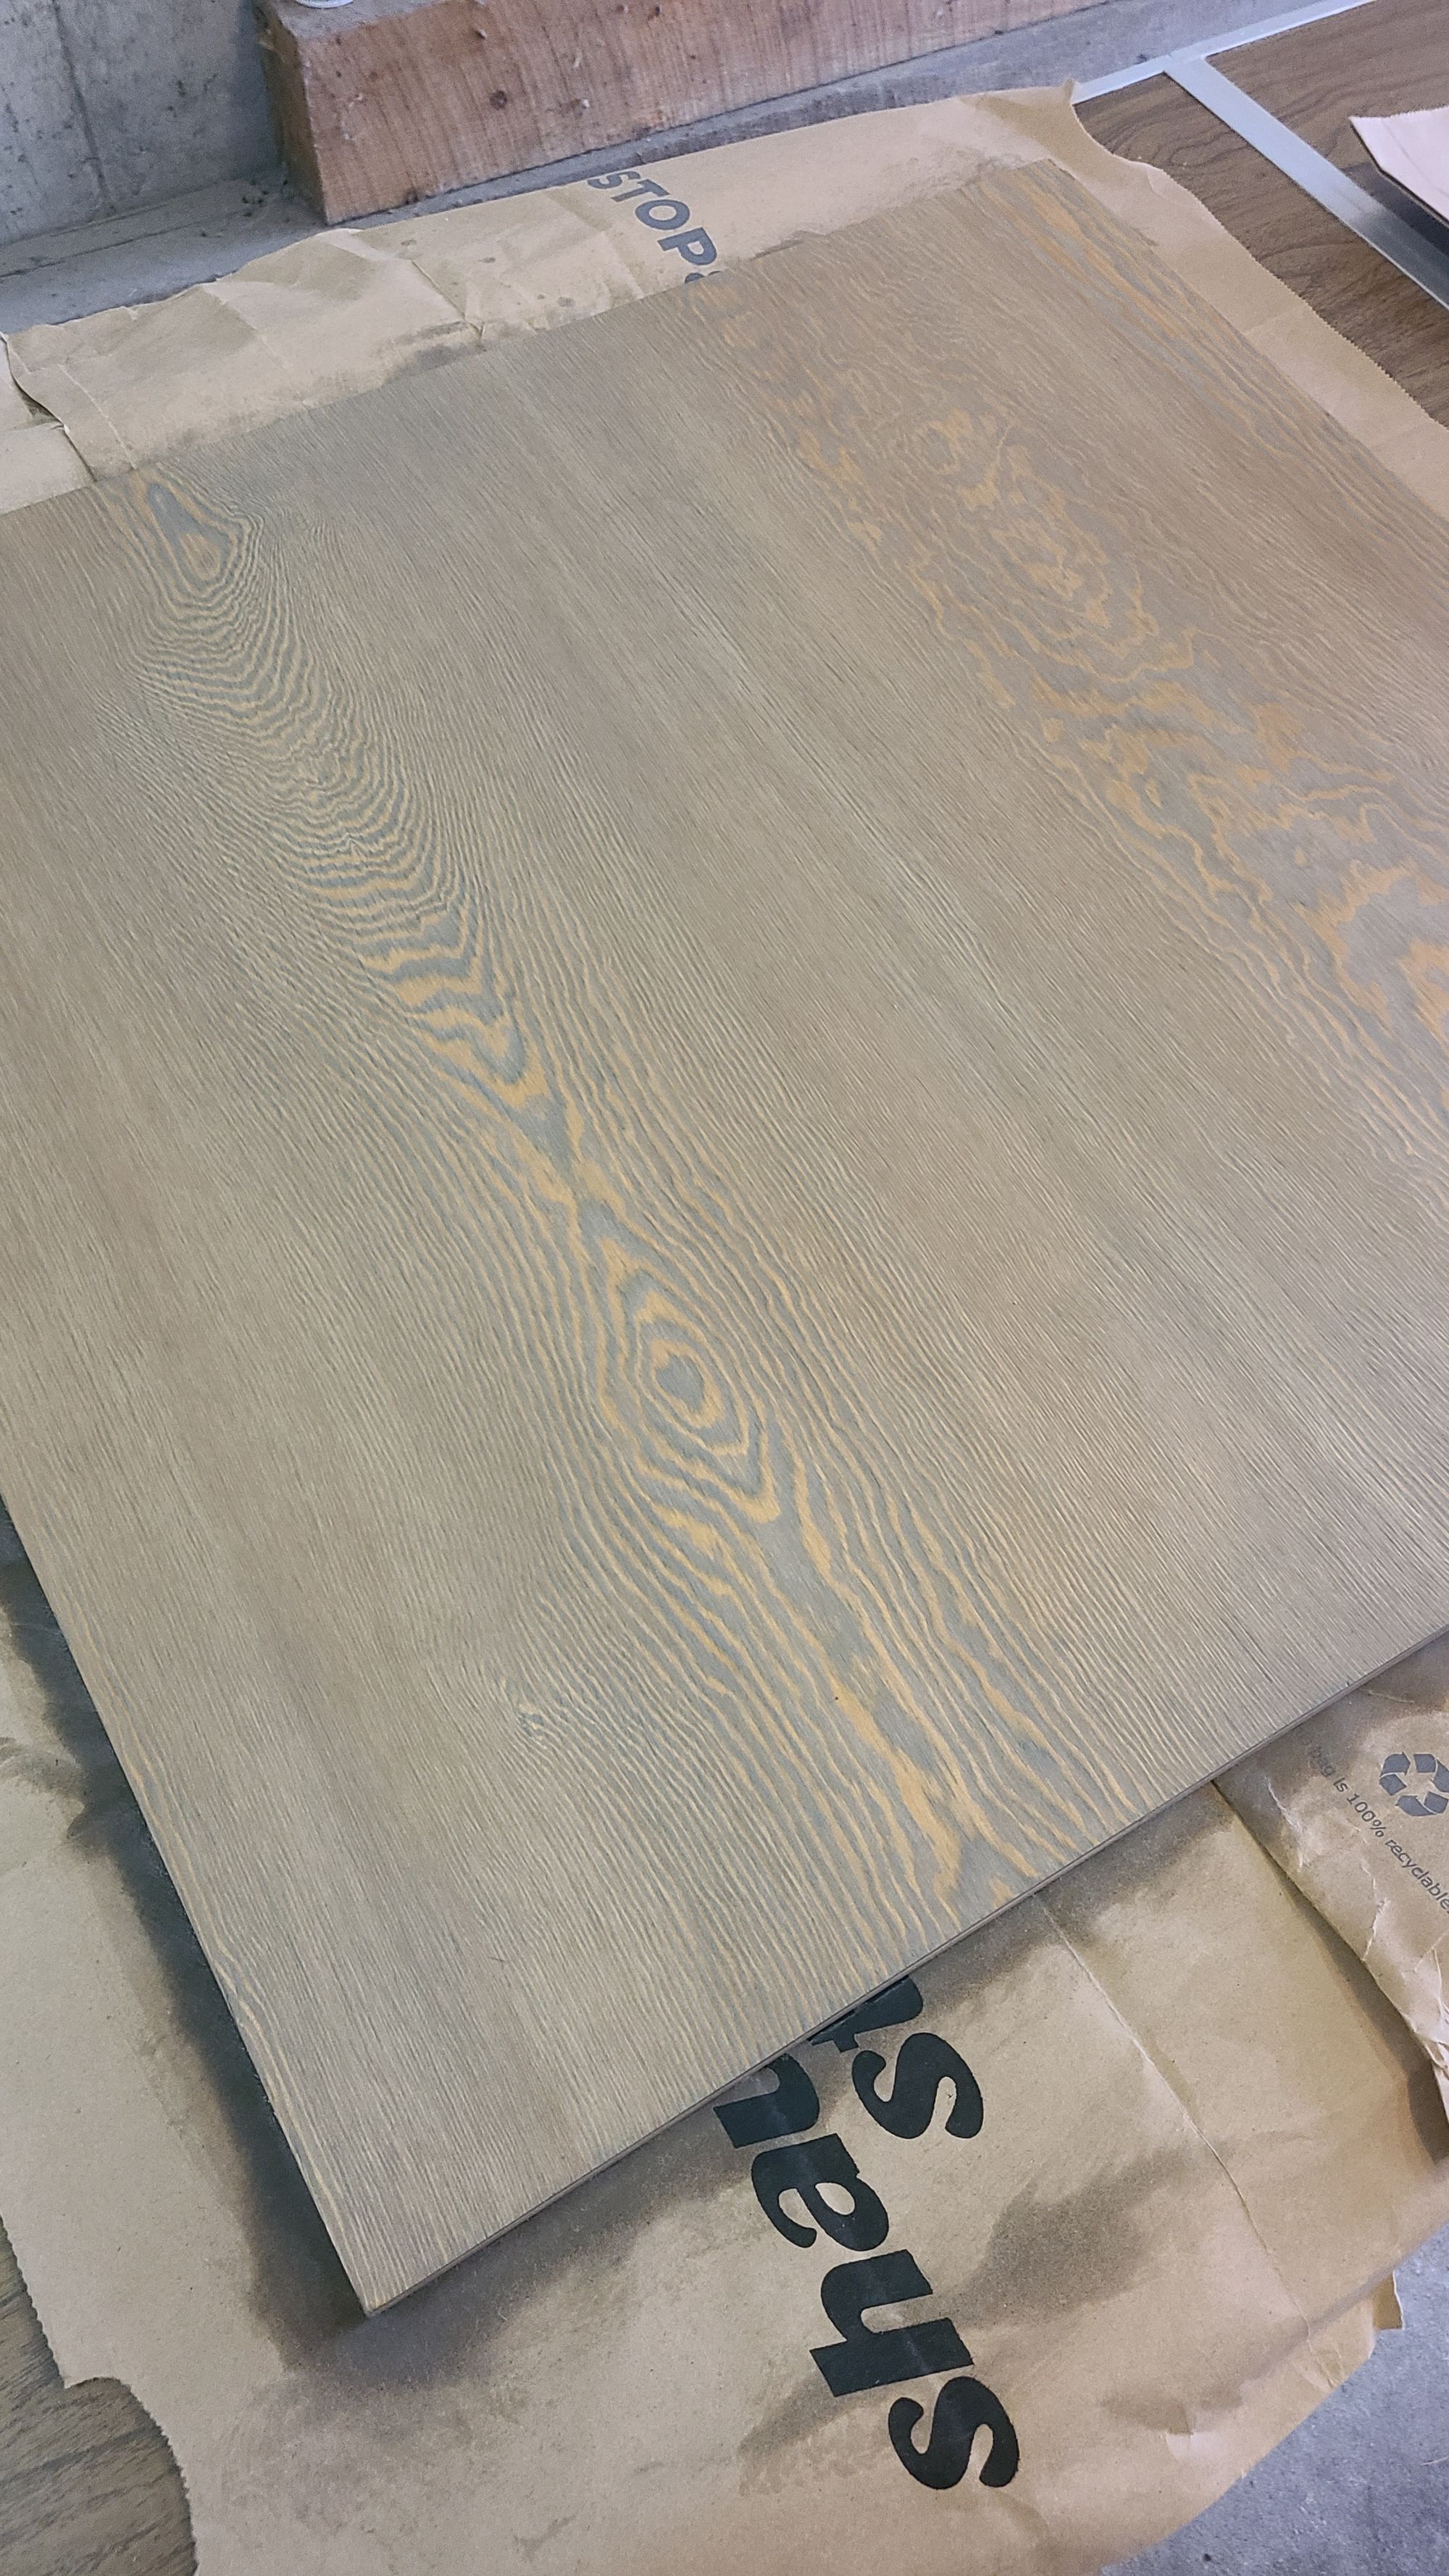
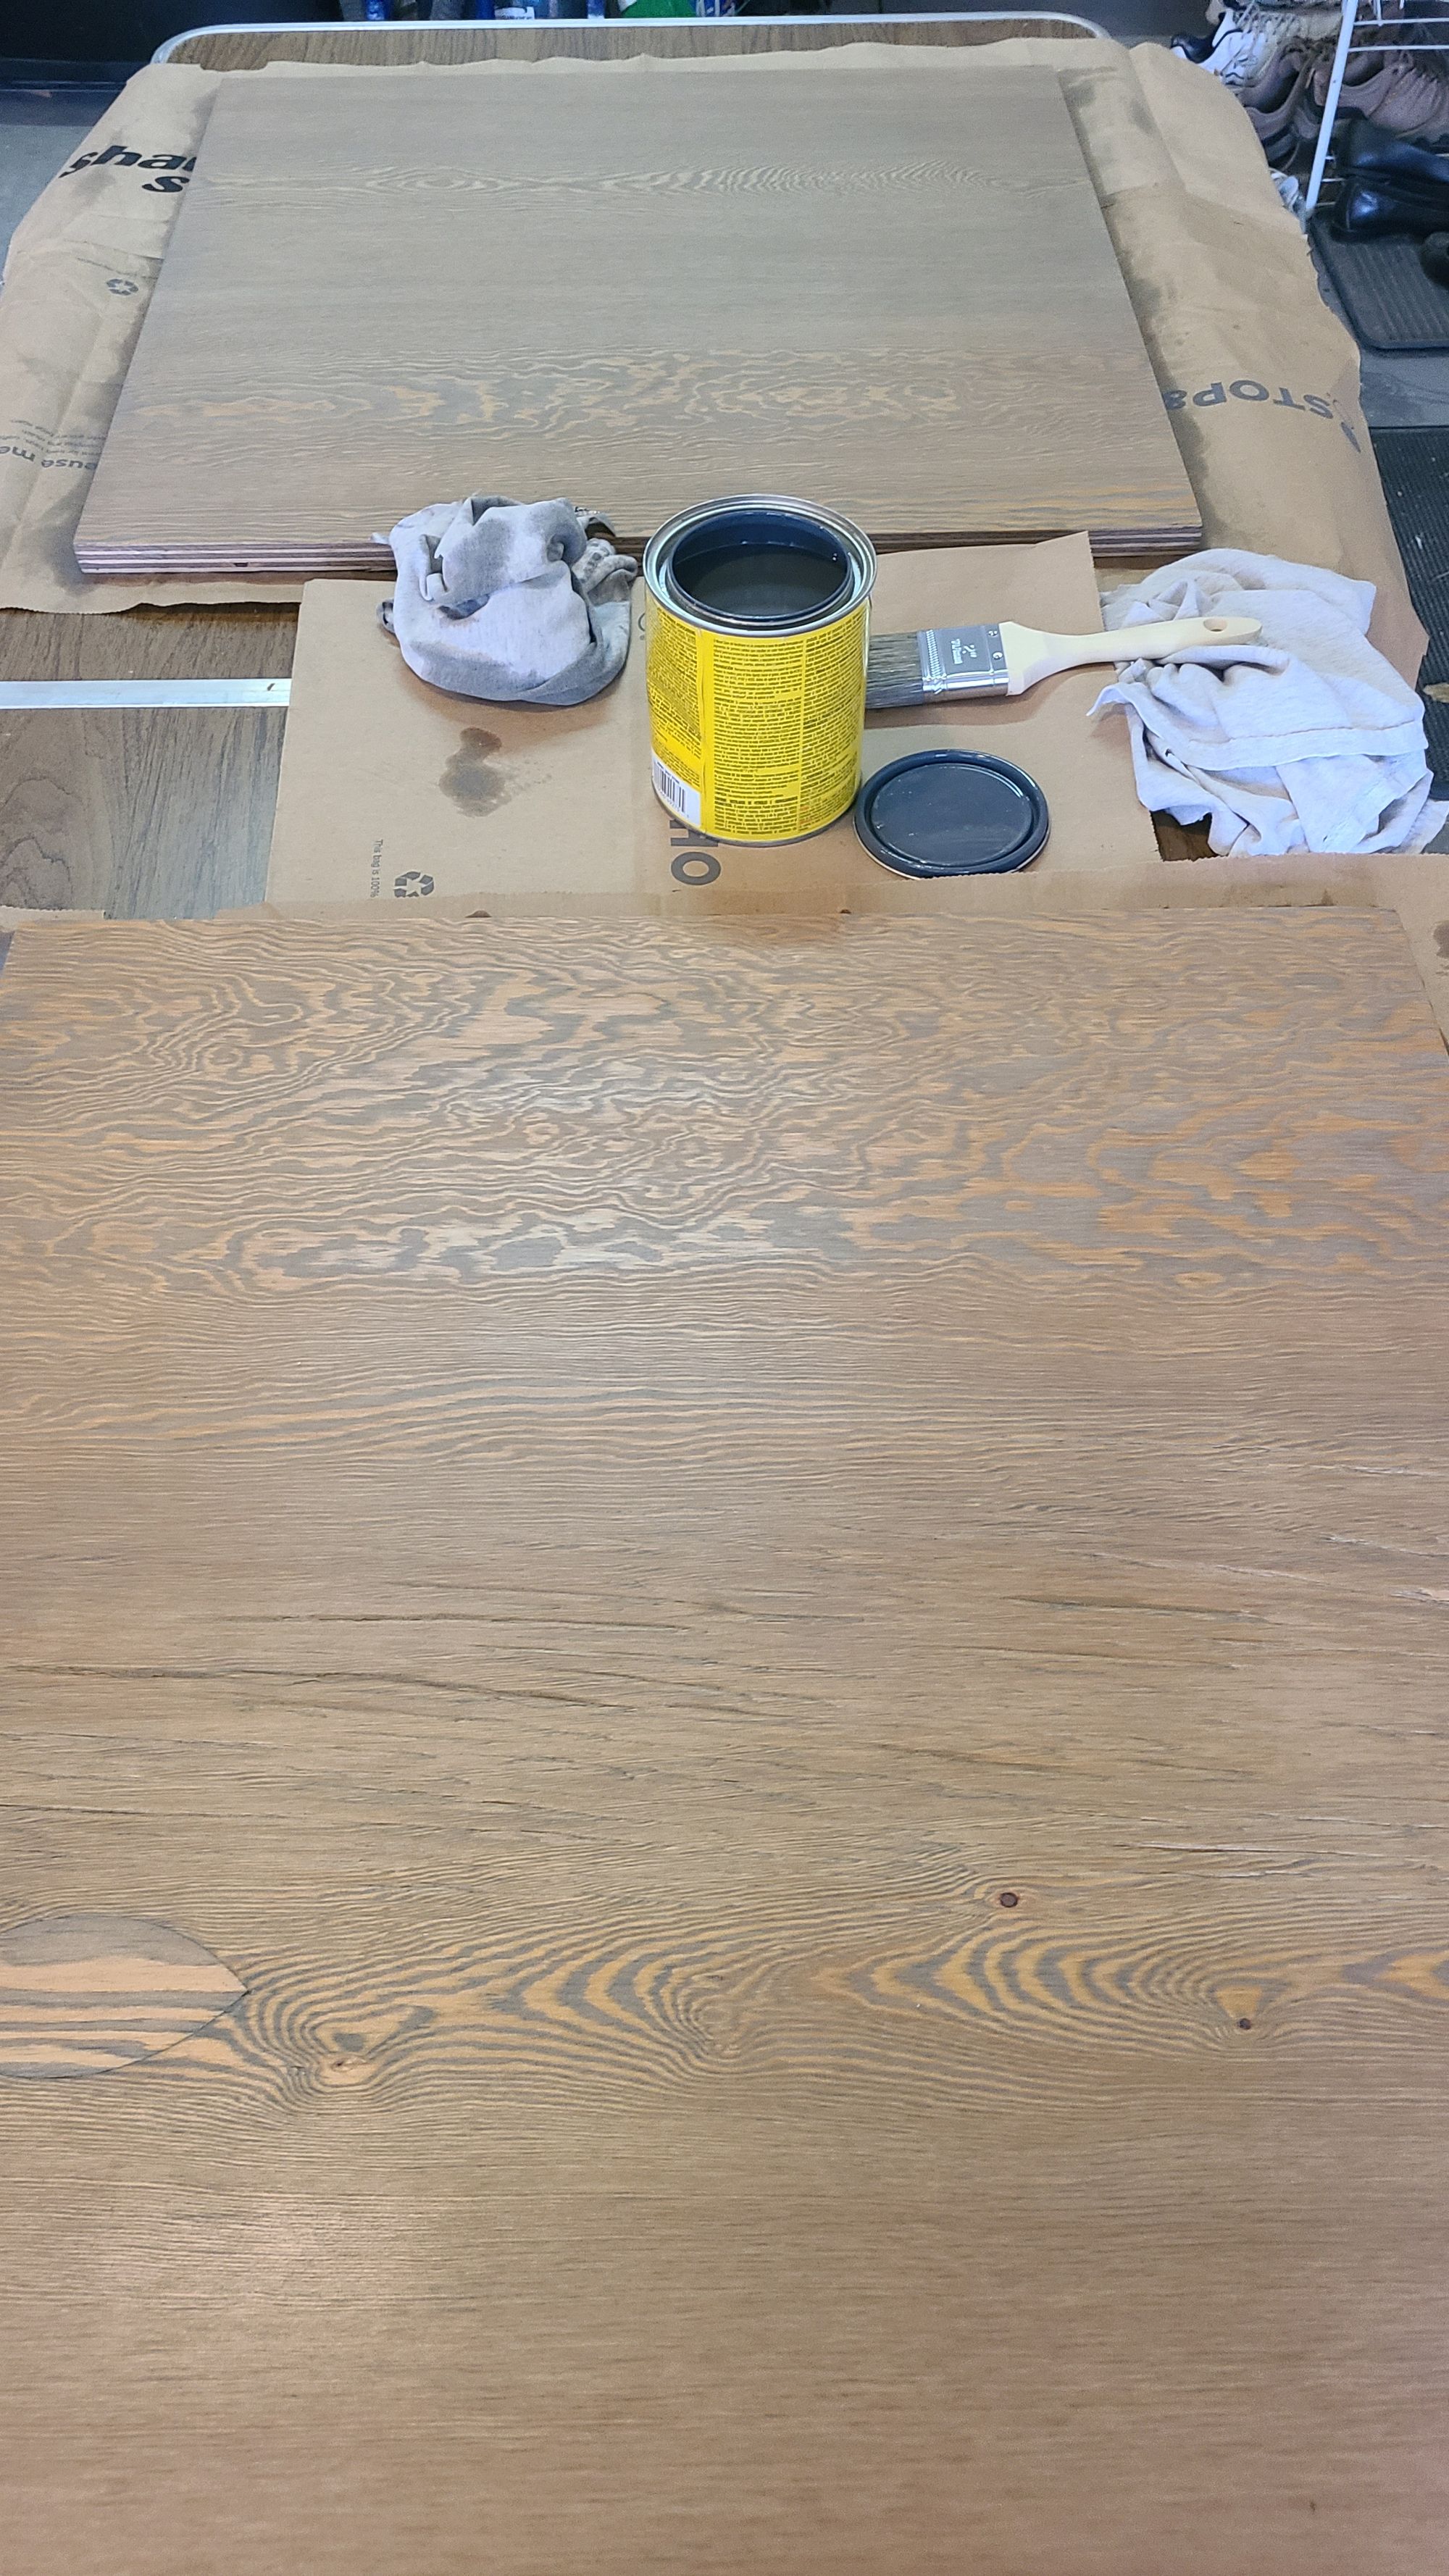
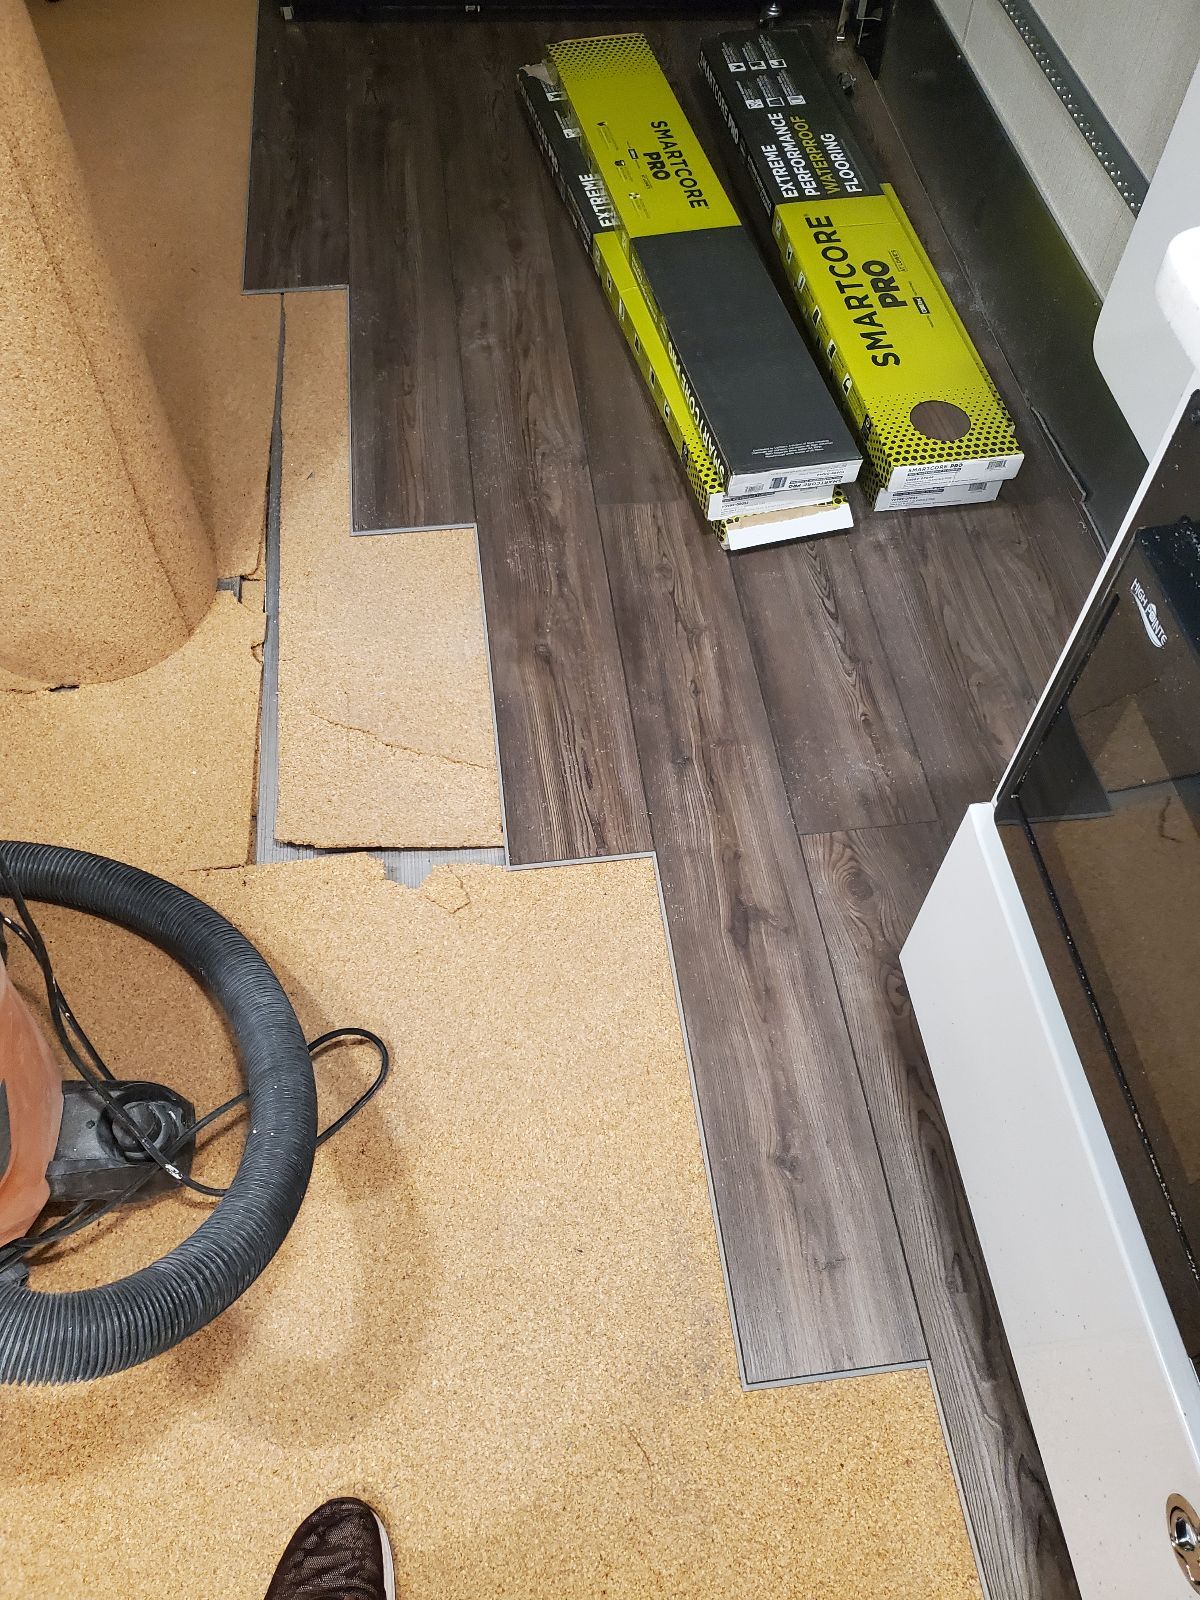
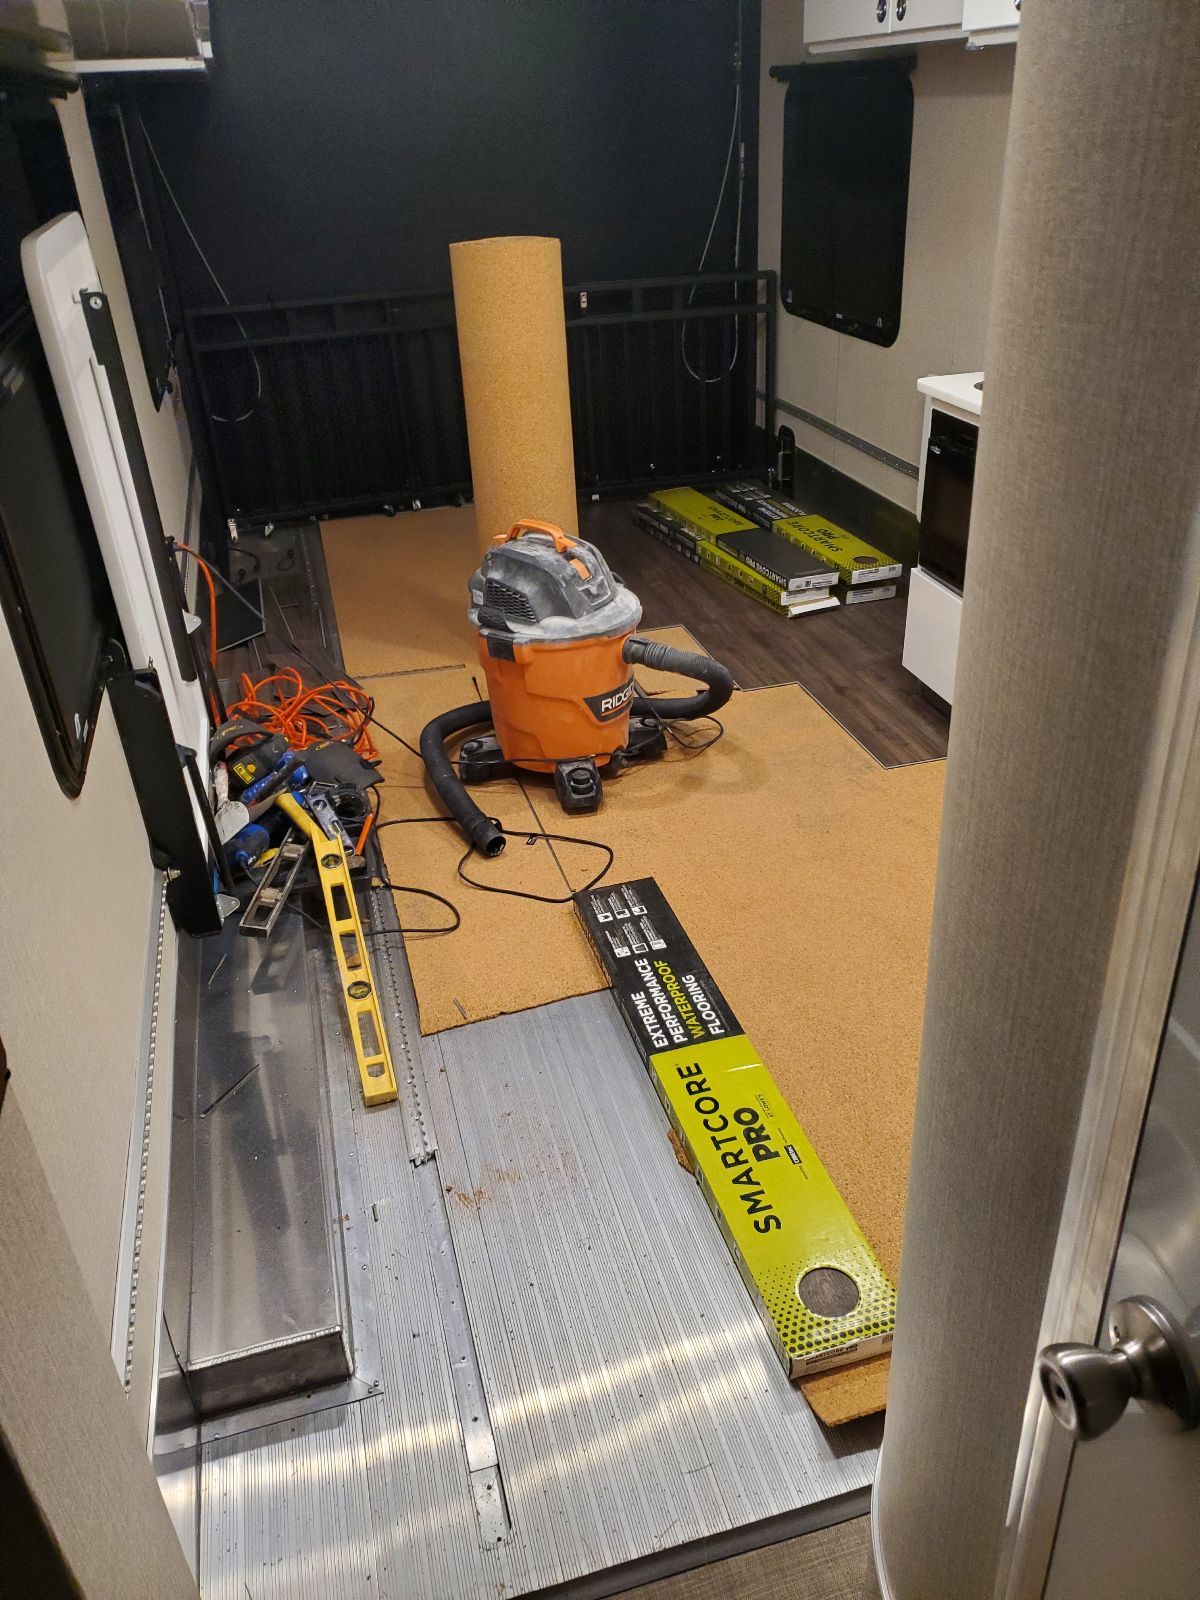
Now let's talk about the fun stuff. The day after Driving School, Paul our handyman got to work on our flooring. At the same time, Anthony and I were up to our elbows in workstation assembly. I had put on my thinking cap and found the perfect bookshelf that we could use as the unit to build off. Then we got some lumber, had it cut, and took it upon ourselves to finish it. Looking back, I honestly don't know how I accomplished this. I am not carpentry-savvy at all. But, I figured out how to build the workstation. I bought all the parts. I sanded/stained the wood. After days of work, seeing the finished product was a proud moment. Then, the fact that we could immediately put it in our trailer with its new floor, was simply amazing. That was the day of transformation. Buggy went from being an aluminum shell to a real home-on-wheels.
Here are some of the progress photos. Stay tuned to see the finished projects in the next post!
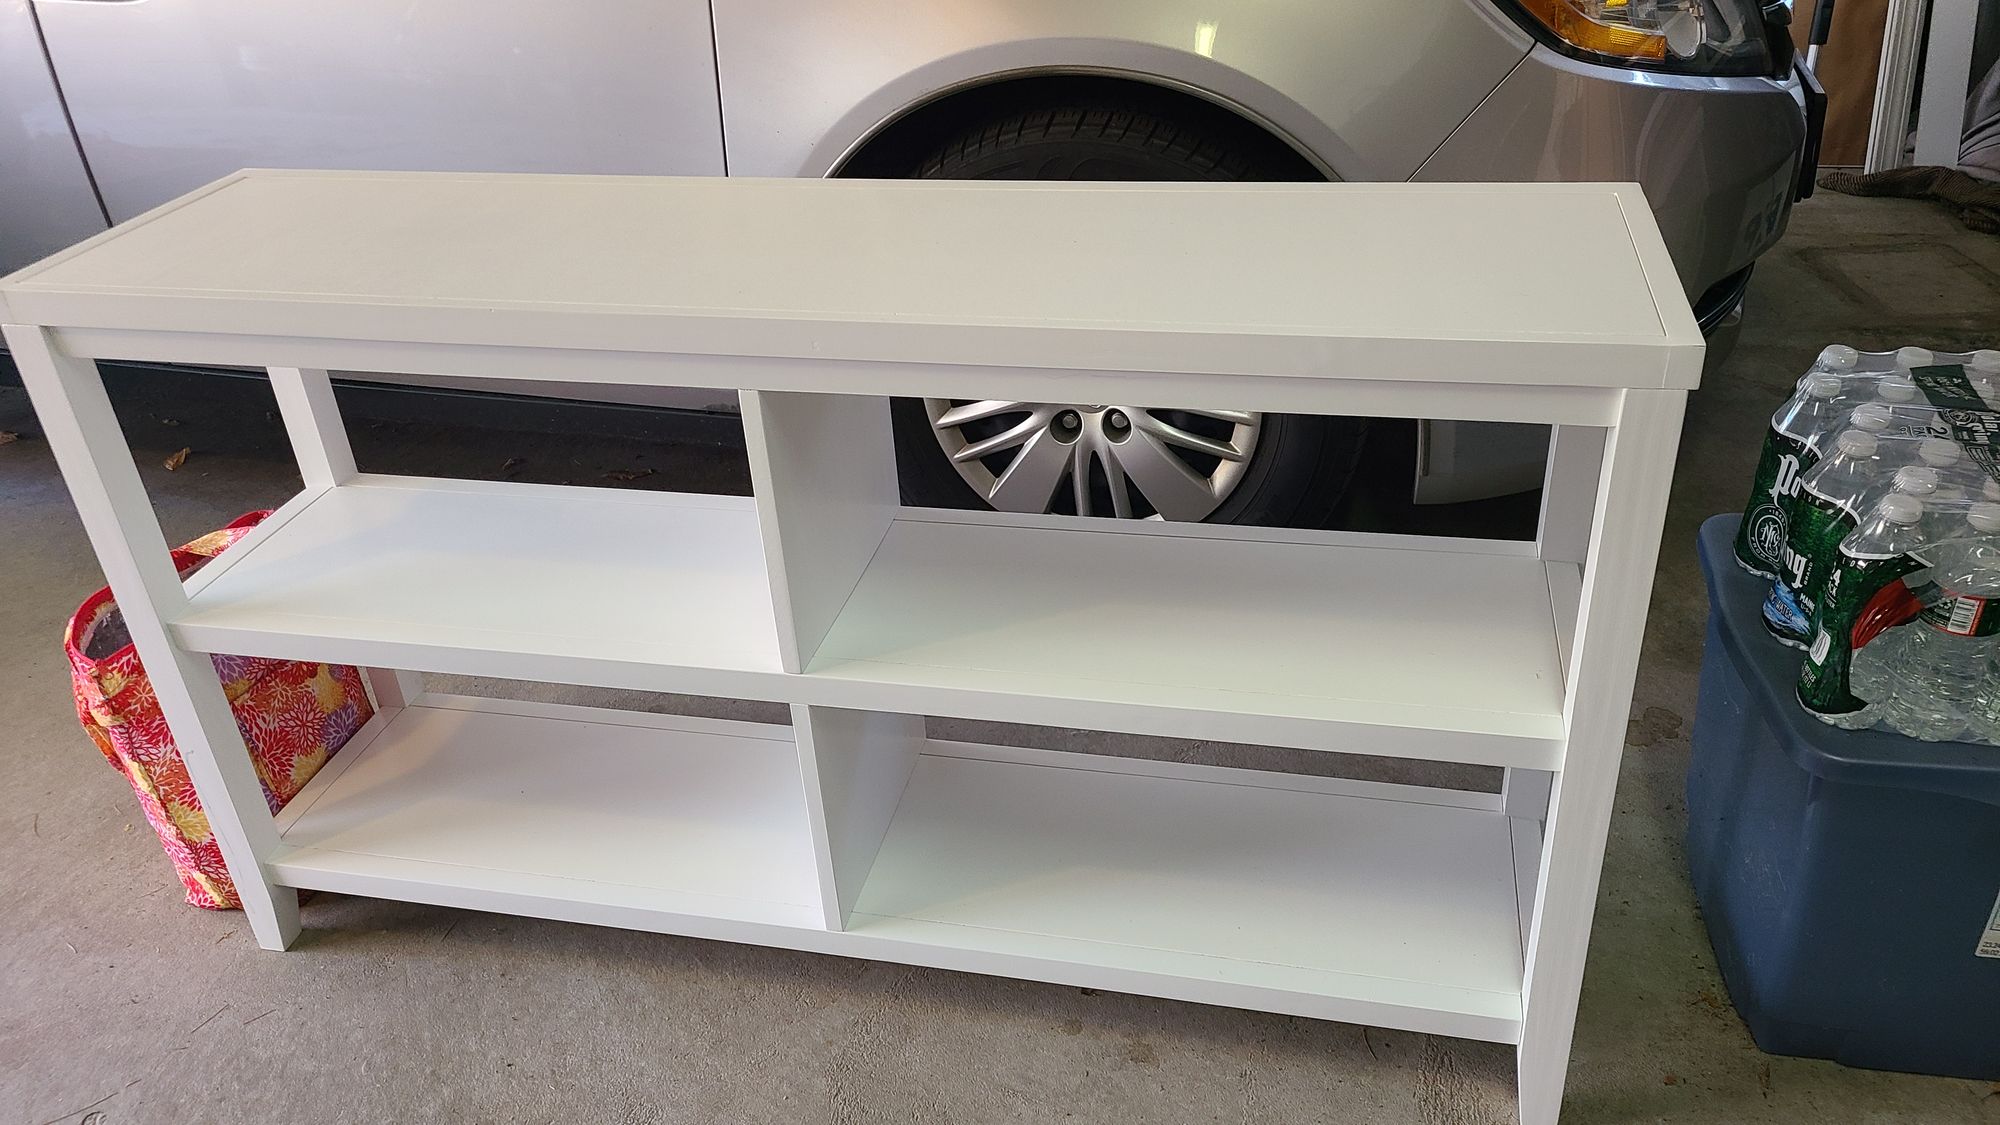
The workstation was technically not the first furniture project I had done for the RV. Months ago, I took an old IKEA cubby, knocked out some of the dividers, and created a litter cubby for our cat Lily.
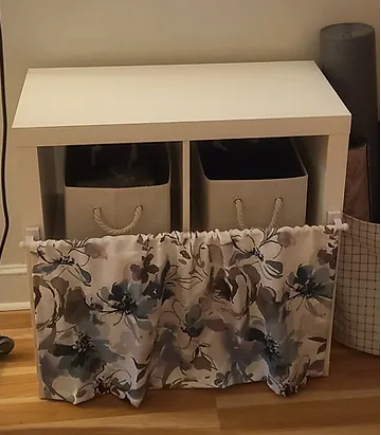
That project didn't involve any actual building; just some demolition and redesign. However, I think that little foray into furniture-repurposing gave me the confidence to dive into the workstation build-out. When we first decided to embark on this RV journey, we promised ourselves that we would embrace learning experiences. Anthony and I are brainiacs, and so we are much more thinkers than doers. We are not mechanically-minded, but we knew we'd have to learn some of these skills in order to be successful RVers. Now that we're seeing ourselves accomplish tasks that seemed impossible just months ago, it's pretty awesome.
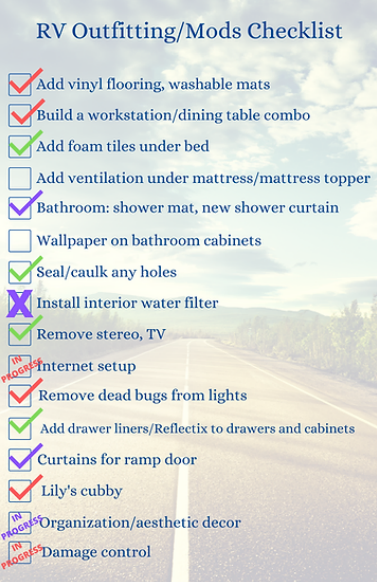
Just these projects alone would have made for an incredibly productive week, but we also got some smaller tasks checked off our list. Anthony researched and ordered all of the components we will need for our internet setup. I continued our damage control by repainting the trim on the back corner of the trailer that got damaged in our ditch sitch. As for the dent on the side of the trailer, that's there to stay, at least for a while. If we want to fix it, we will likely need the entire panel replaced, and we're not in a place to do that right now. And lastly, we began planning out our RV organization. We measured all our cabinets and shelves and bought storage containers. Then we started brainstorming where we were going to put all of our belongings. That will be a feat in itself, but organizing and planning ahead can definitely help.
As November transitioned into December, we were well on our way toward the finish line...which is really just the starting line! Knowing that we will be able to hit the road in a trailer that truly feels like ours is a huge relief. It's just added to our excitement and anticipation for what's to come.