Outfitting, Part 5: Project Success!

In this post I will be sharing more details about our big projects for customizing our Gamechanger Pro and building it out residential. These projects are installing vinyl flooring, building a kitty litter box cabinet, and building a workstation/dining table combo unit.
Vinyl Flooring
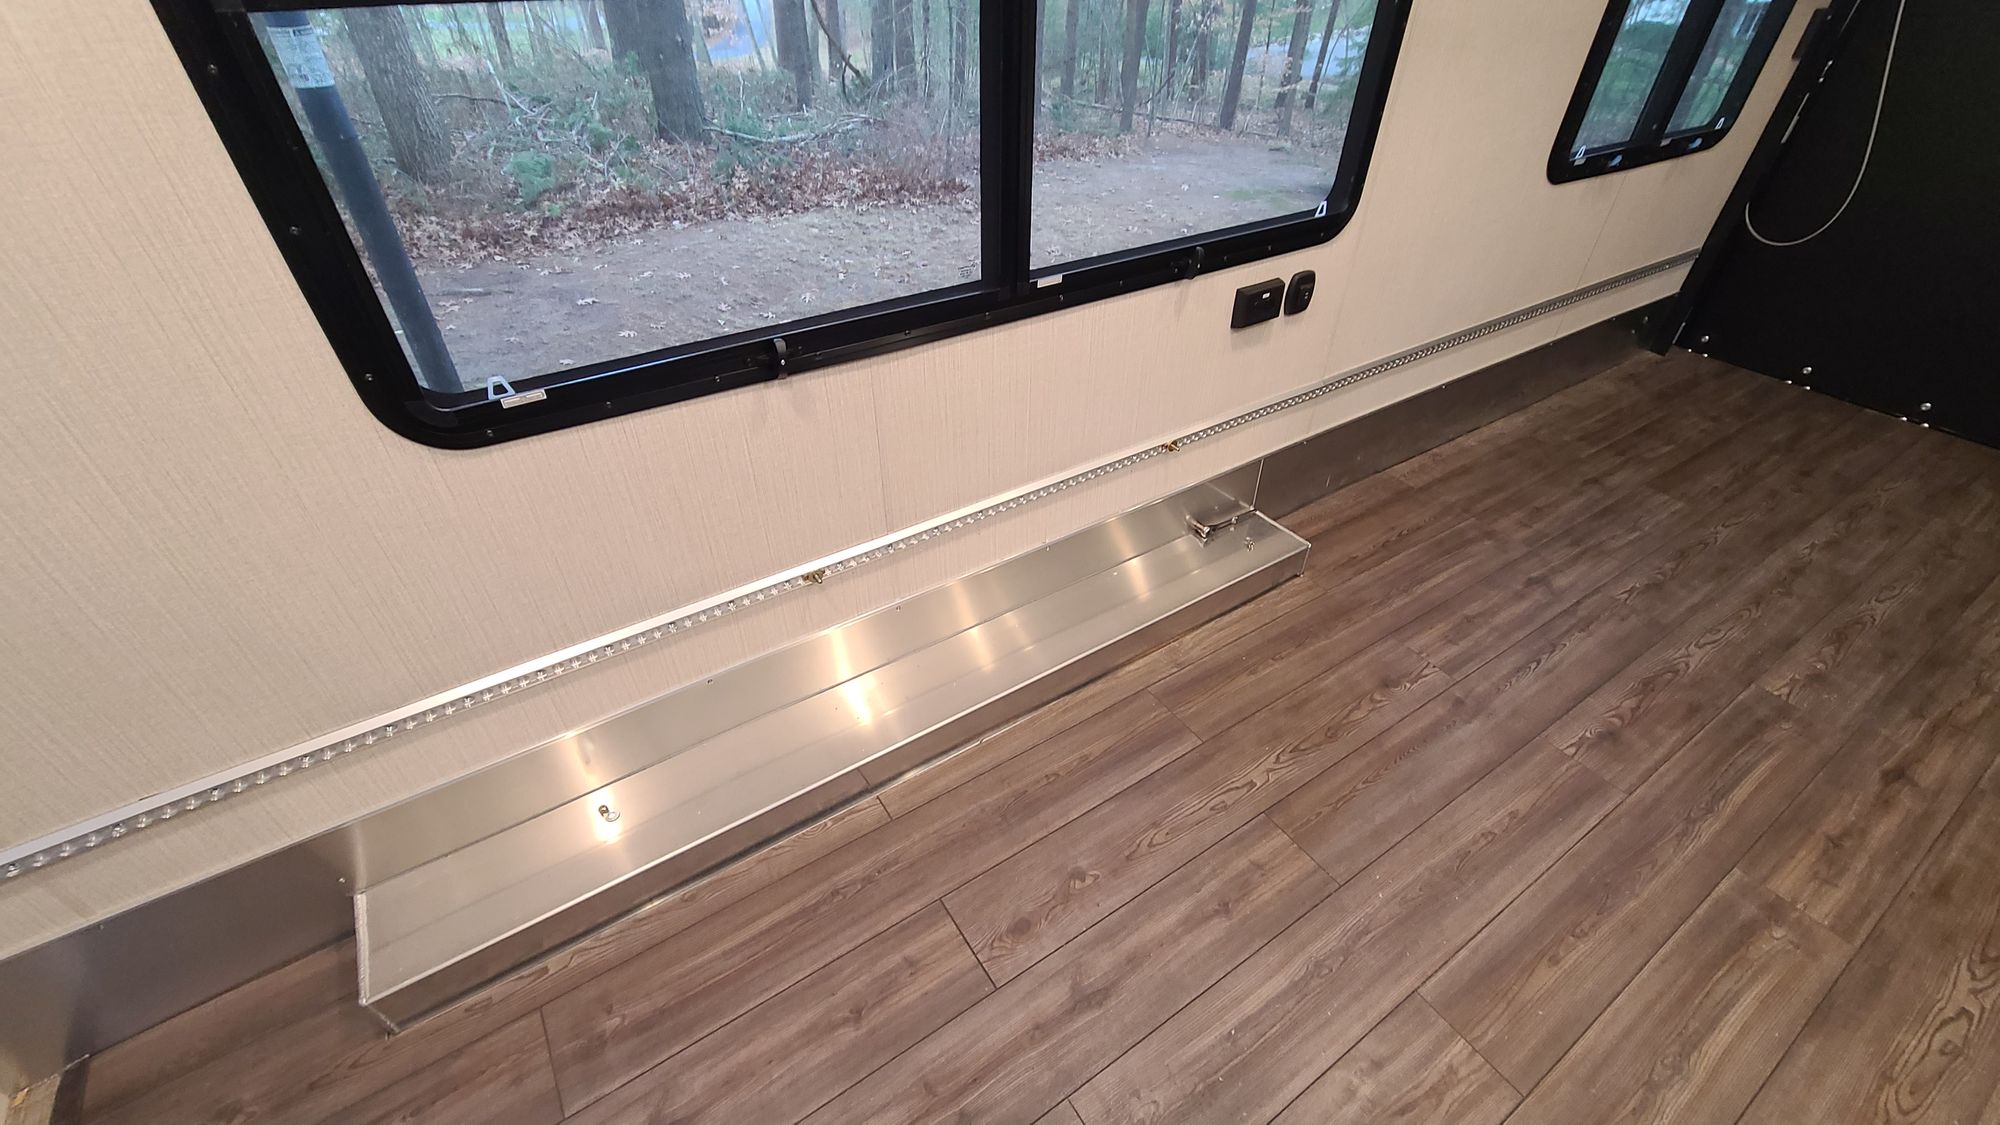
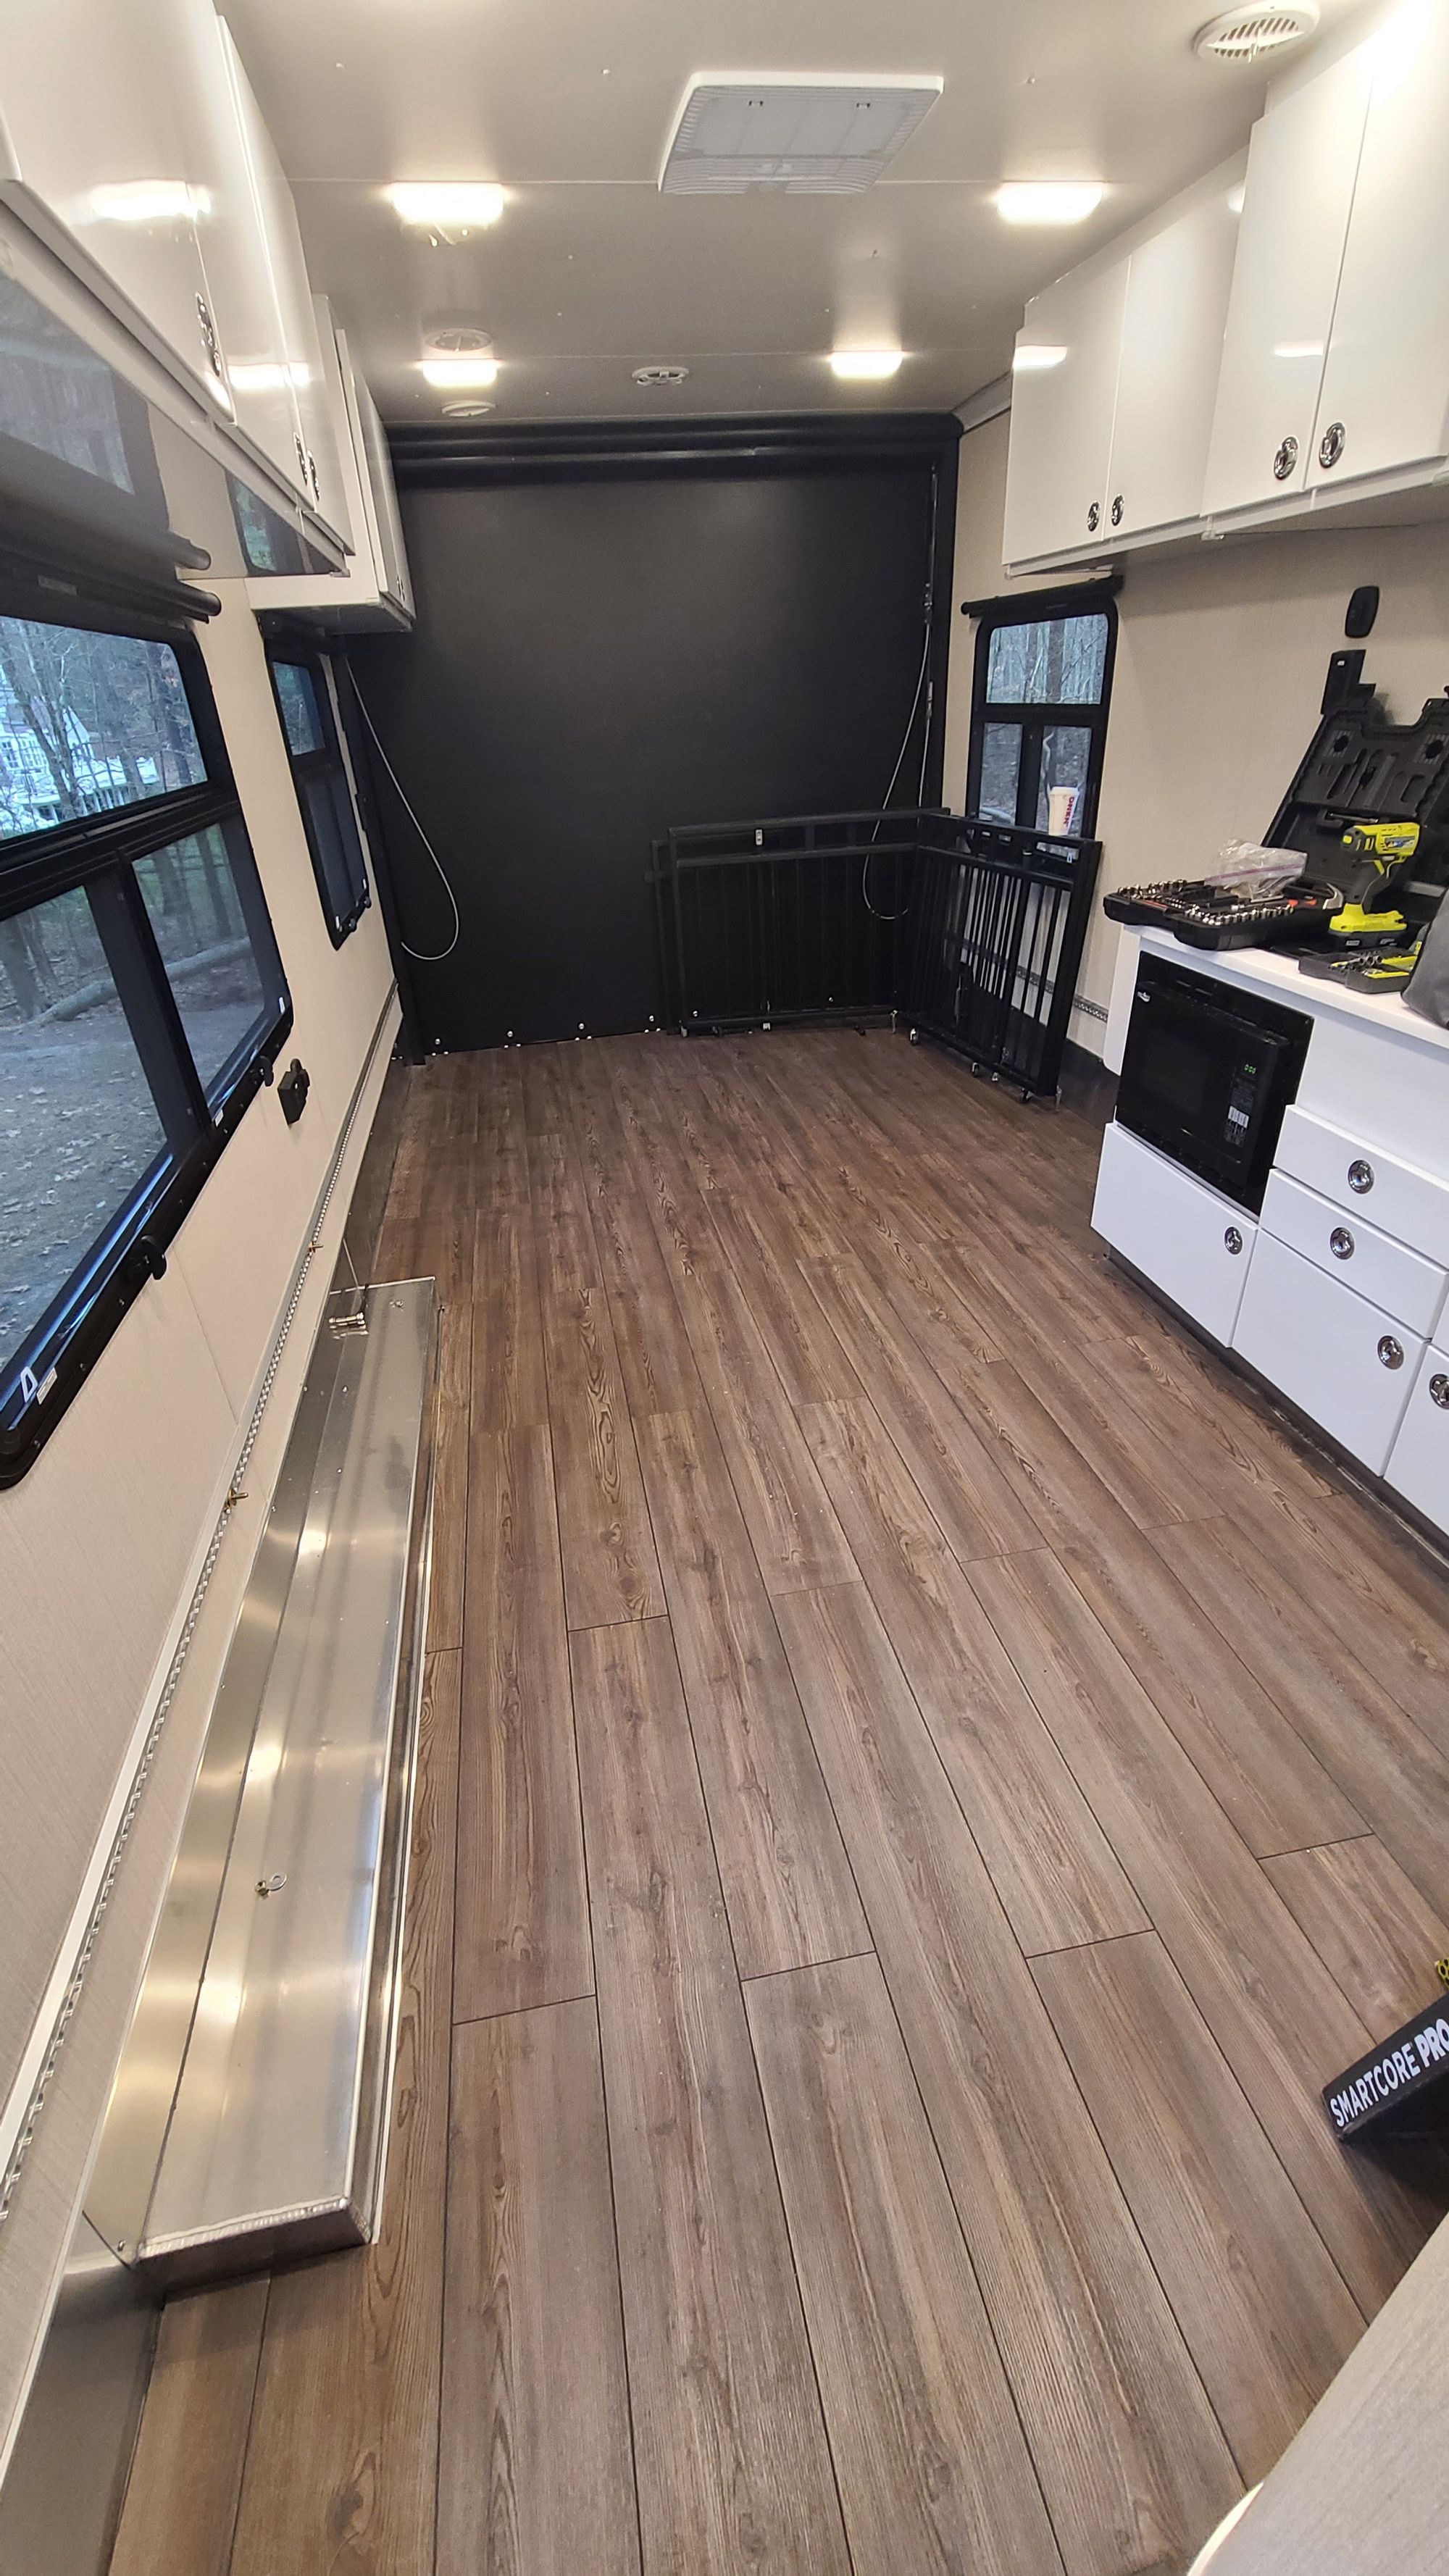
We began researching our flooring options before we even put a deposit down on our trailer. We first wanted to make sure that adding flooring on top of the corrugated aluminum would be an option. We discovered in the ATC owner Facebook groups that there was one type of flooring in particular that was a go-to for these RVs. This is the SmartCore vinyl from Lowe's. There are a few different kinds, but the general idea is that these planks are good for humid environments and variable climates. They are also quite durable. We decided on a gray-brown faux-pine plank, to add some contrast to our white cabinets. We did not do the install ourselves, but instead hired a handyman. We all brainstormed the best way to install the flooring and ultimately decided on a cork underlayment, that should help keep condensation and moisture at bay. We also took a risk by tearing out the recessed tracks in the flooring. These are typically used to tie down toys when hauling, which we are not doing. Though it might affect resale, we decided that the risk was worth it because taking out the tracks meant that the underlayment and vinyl could be laid flush to the aluminum floor underneath. It also gives us a nice, uniform look without tracks running through the floor.
Before:

In the above photo you can see the corrugated aluminum flooring, tracks, and the vinyl mat that comes with the trailer. This mat is removable, and we took it out so we could run flooring throughout this whole main part of our trailer.
After:
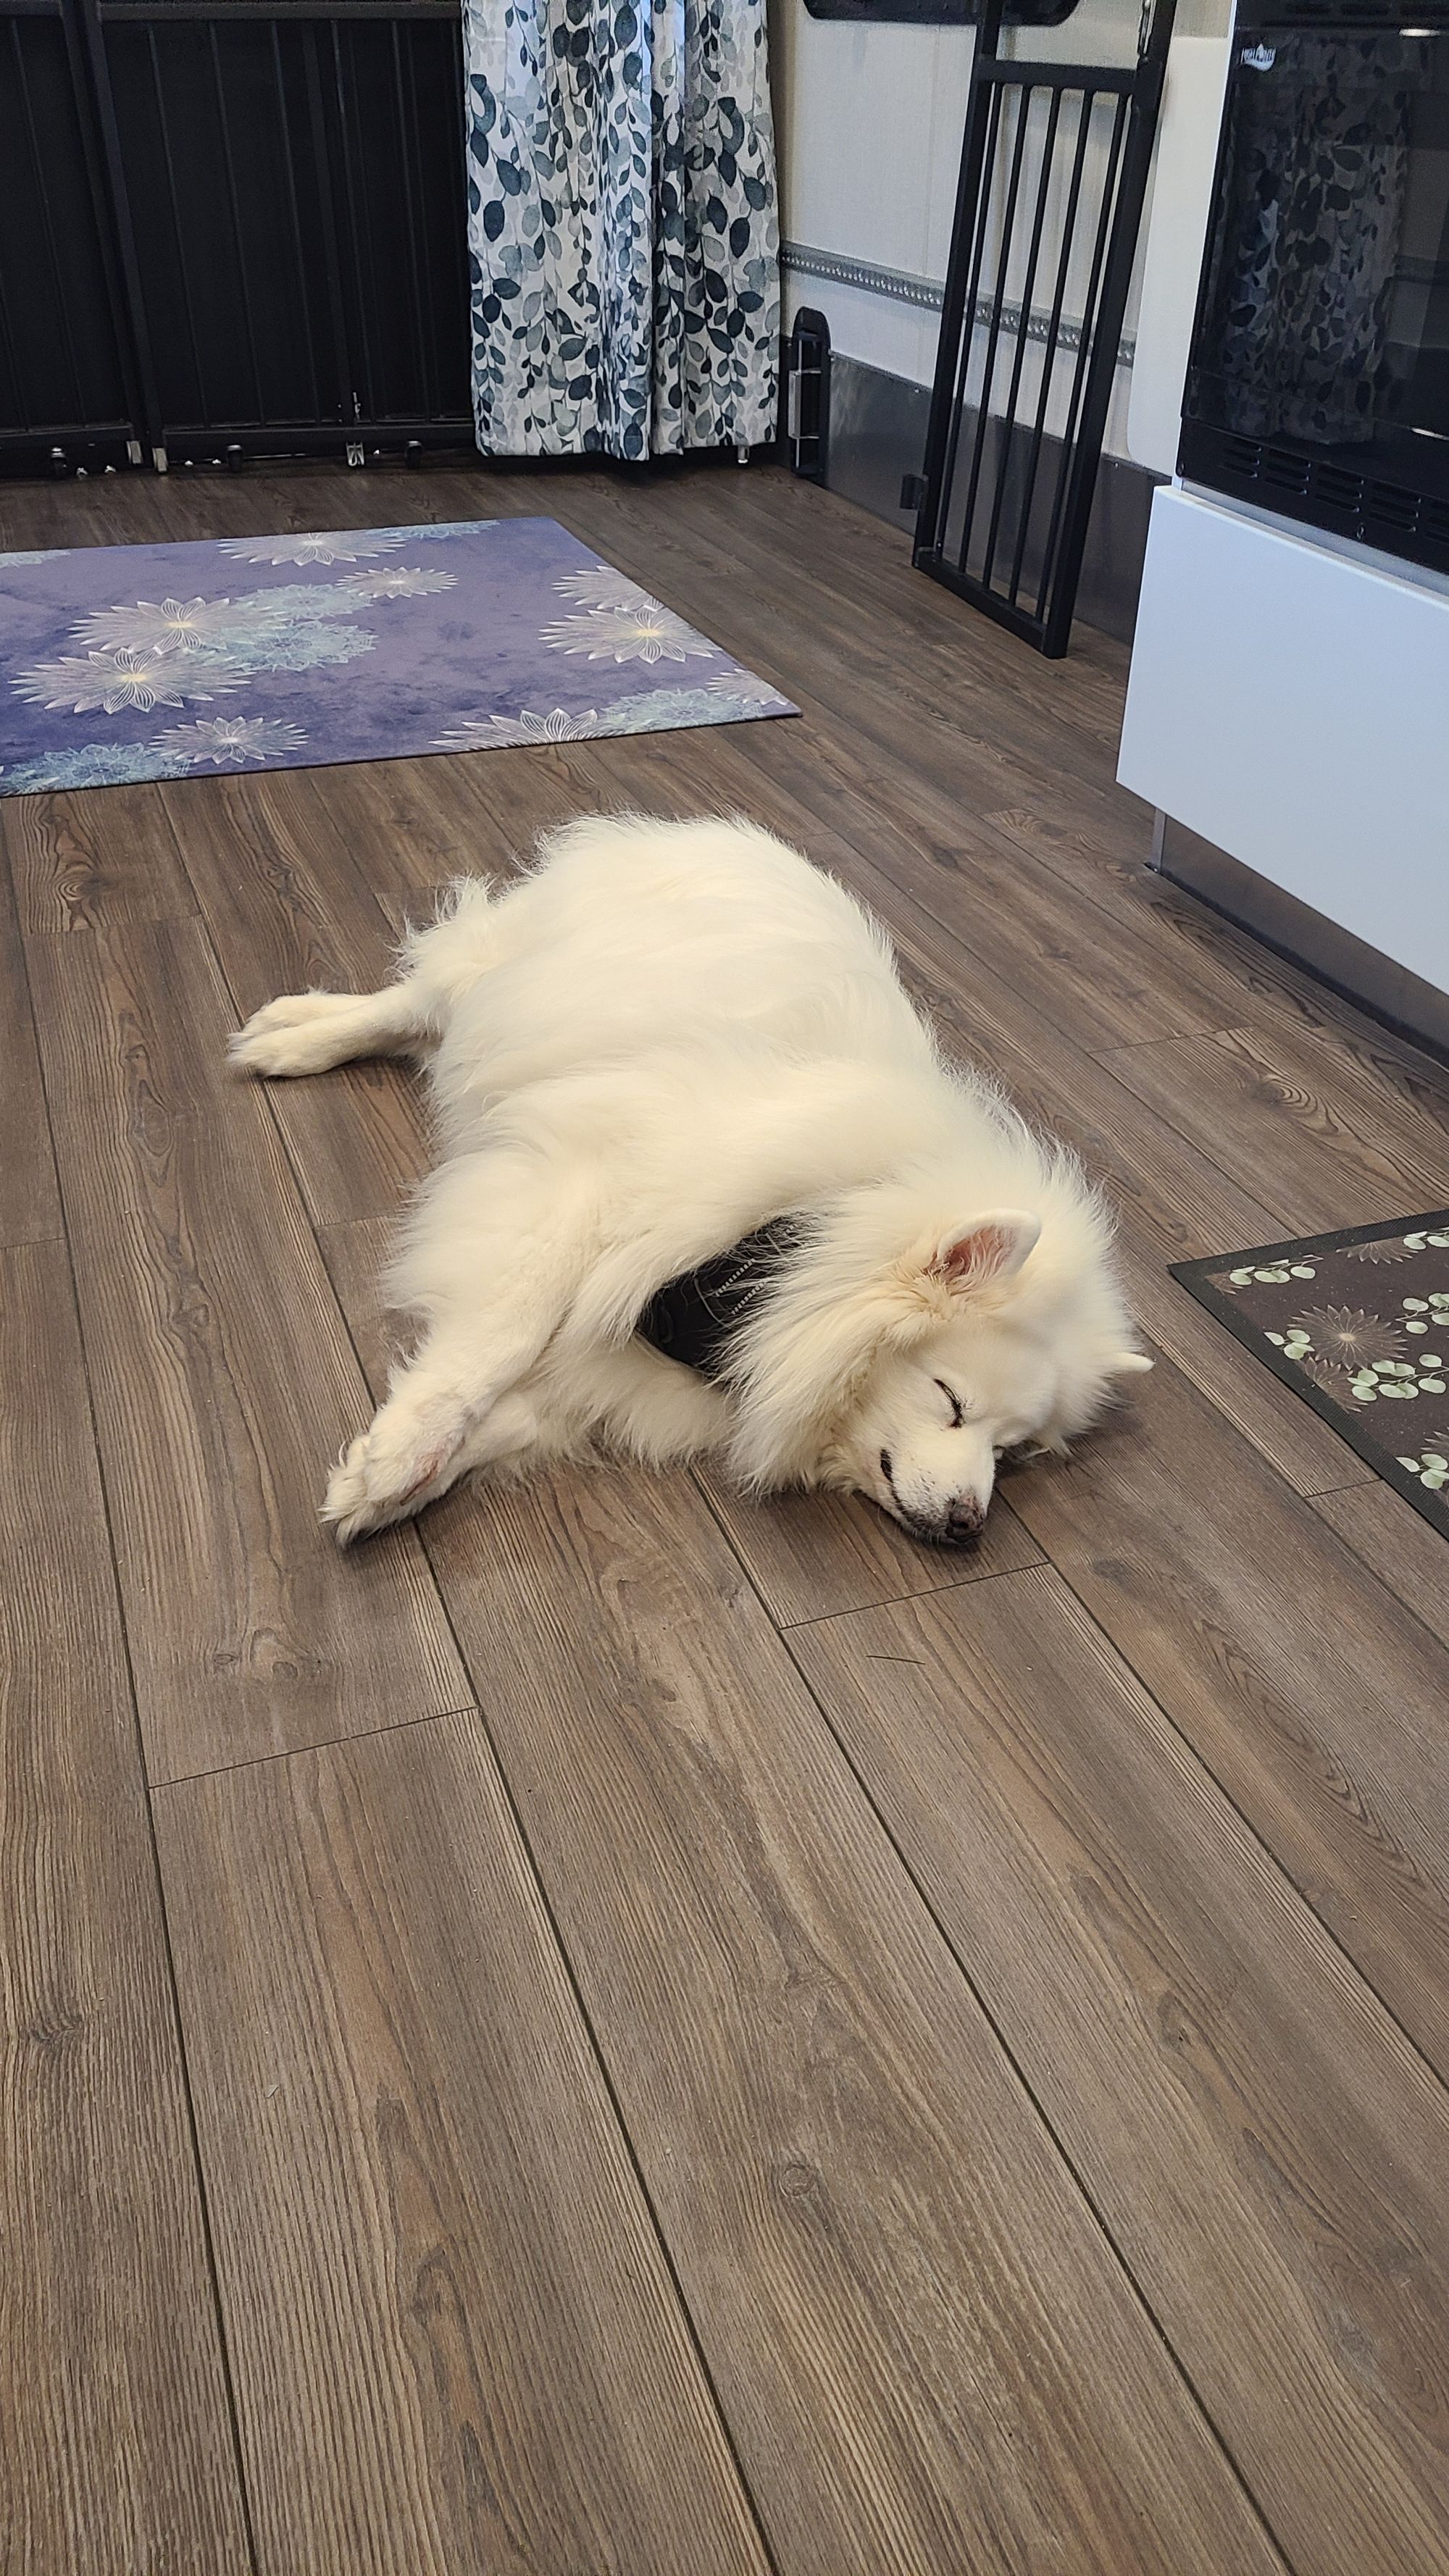
Tanny seems to approve!
Kitty Litter Cubby
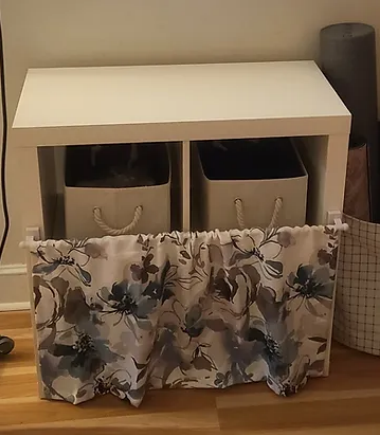
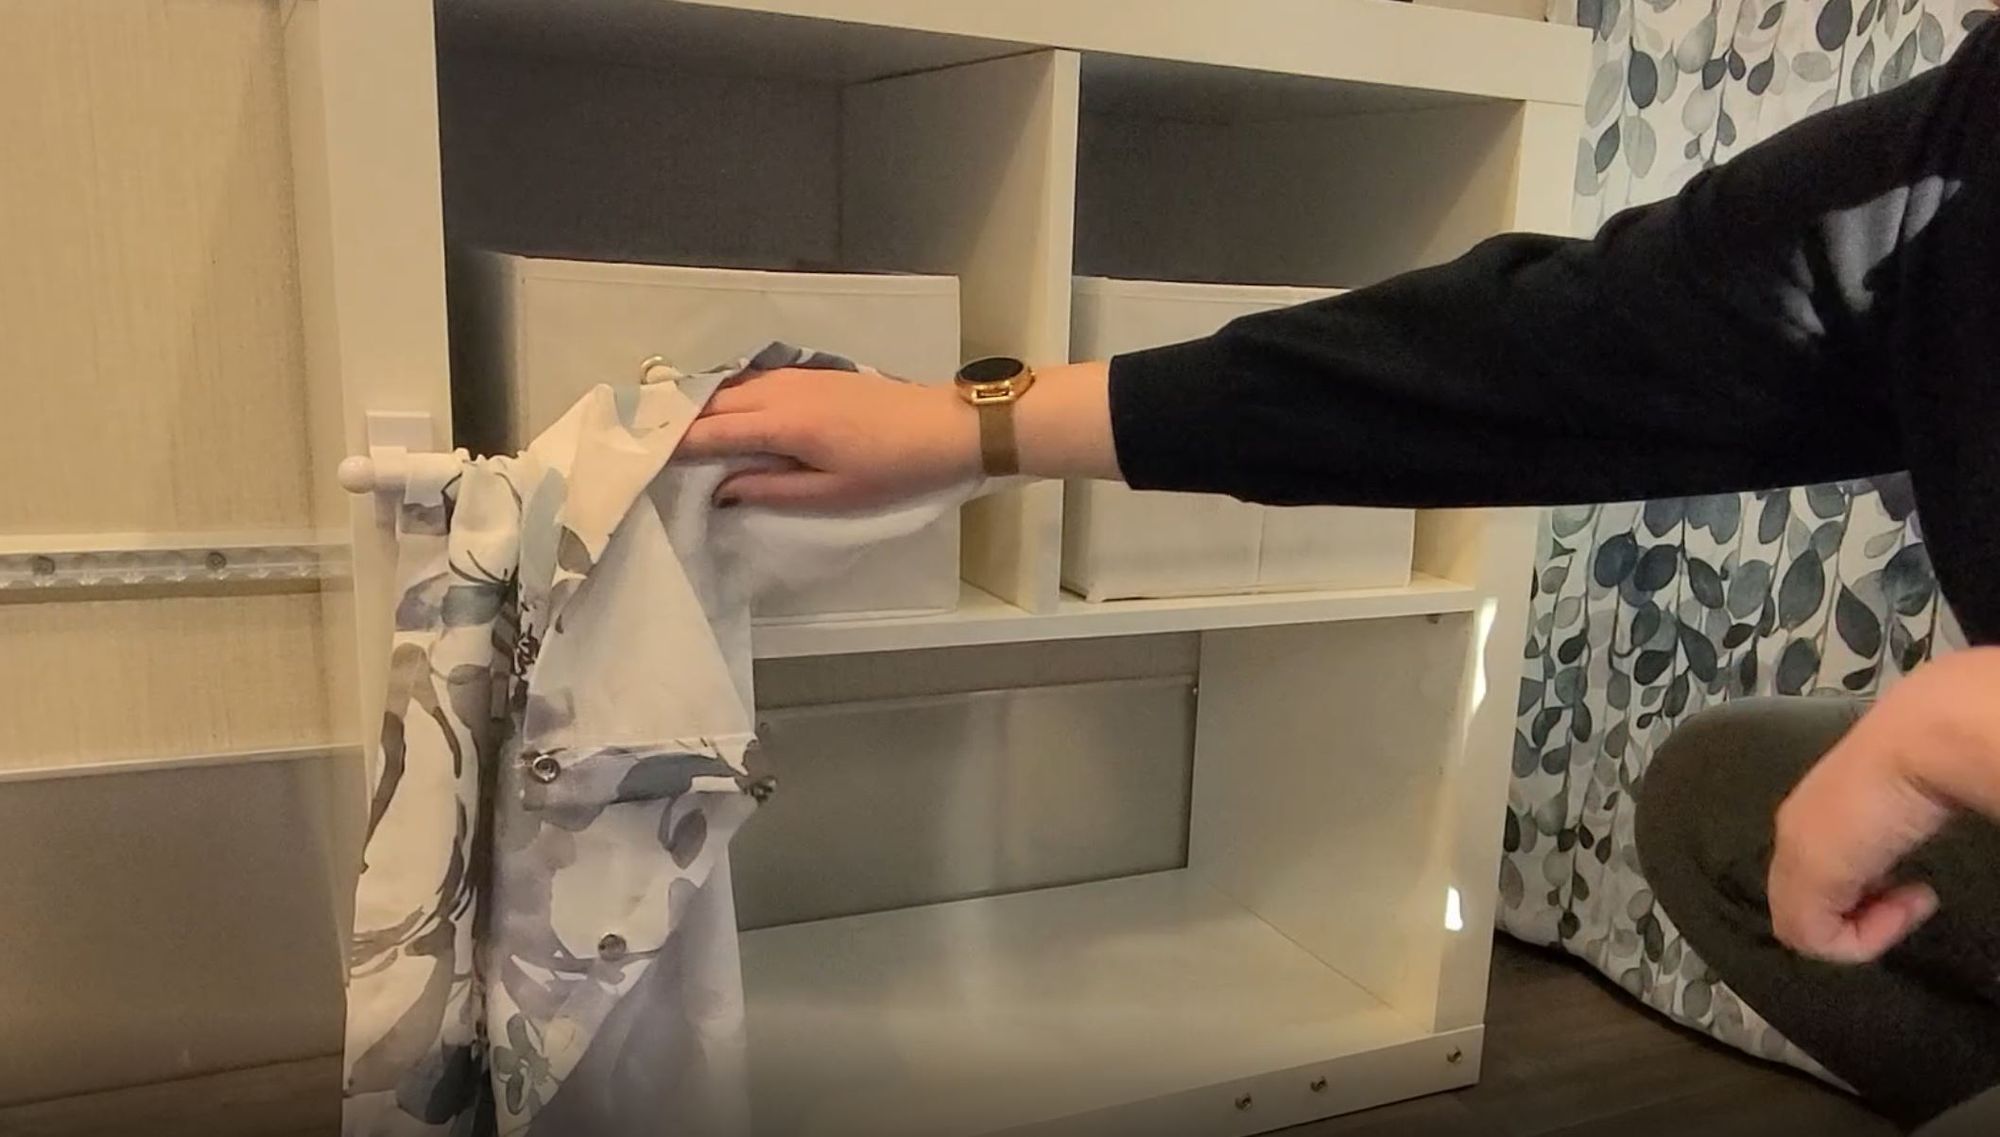
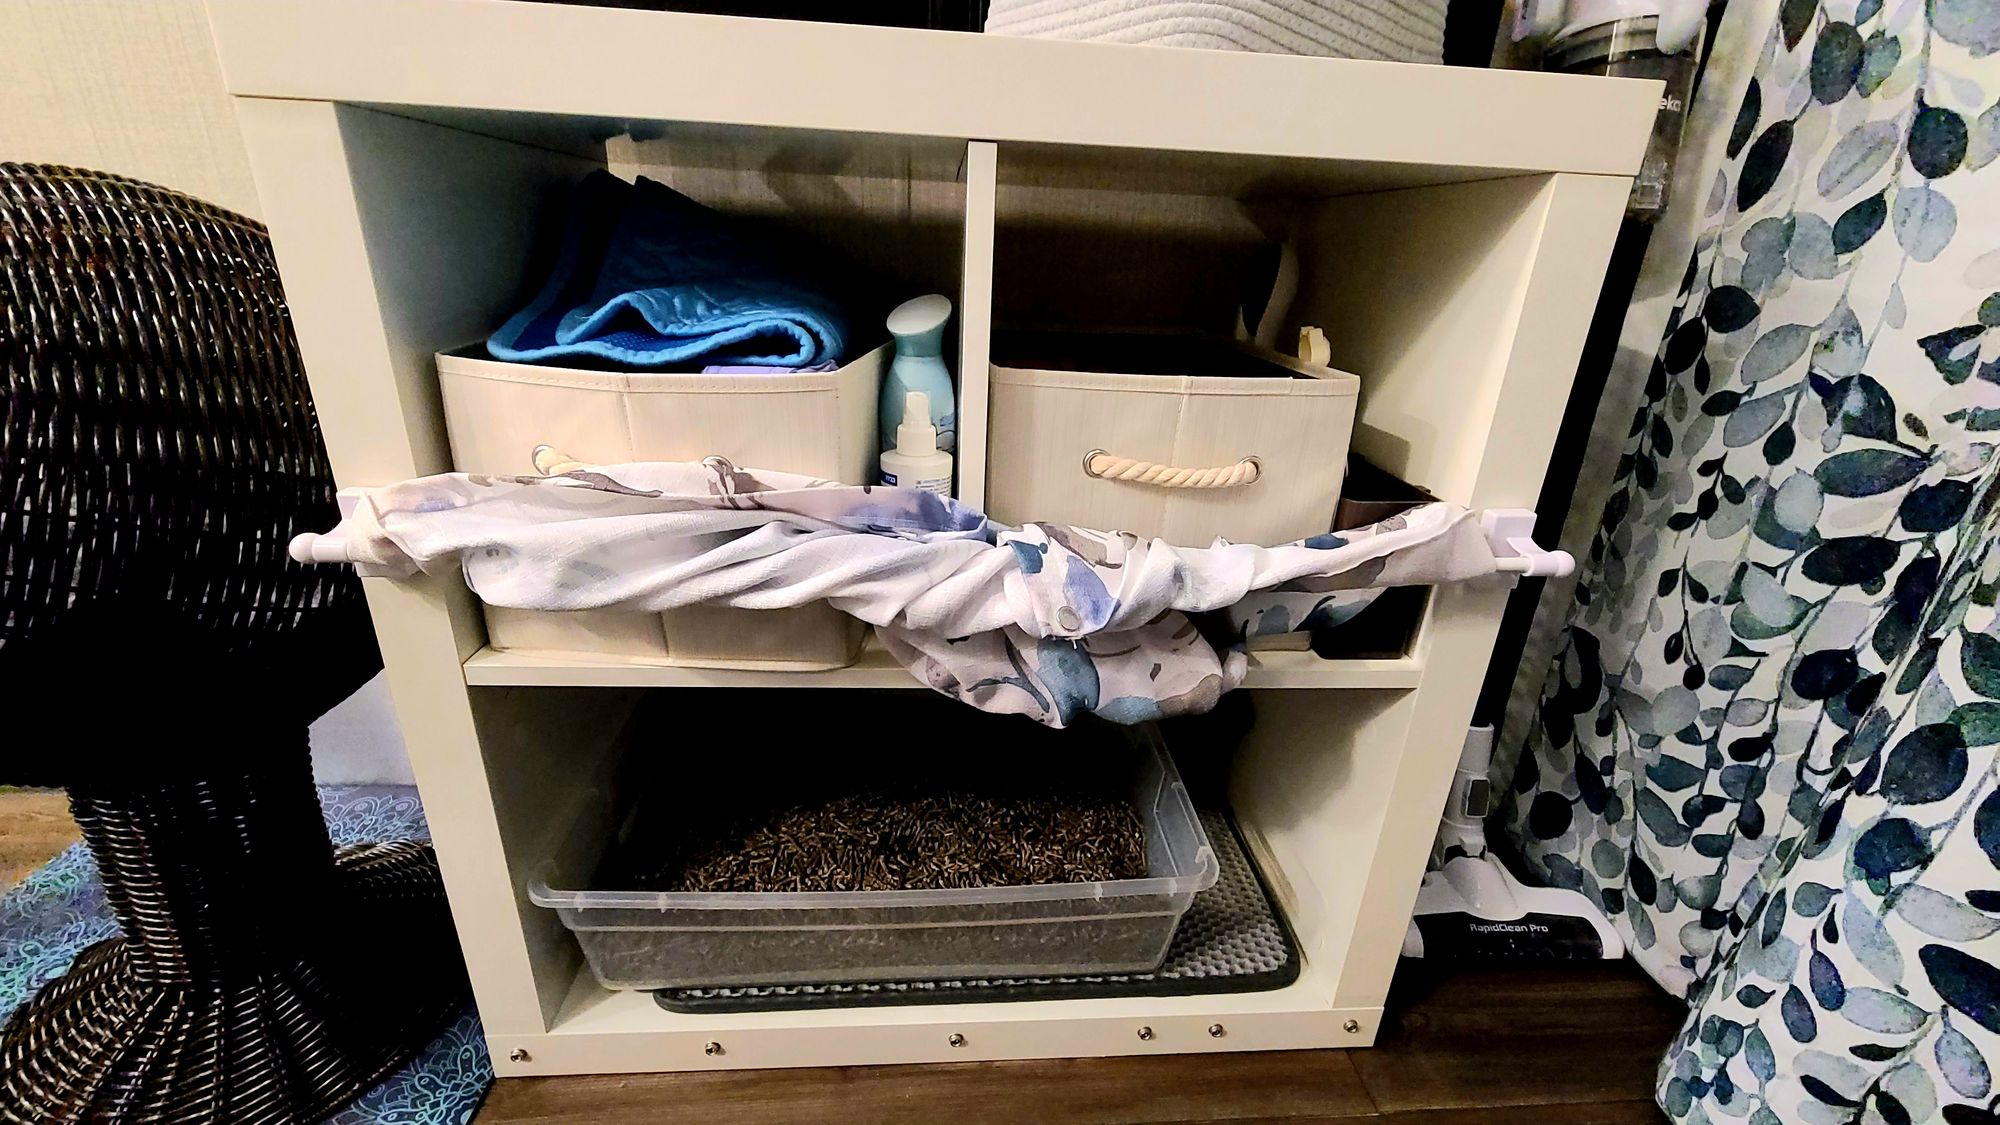
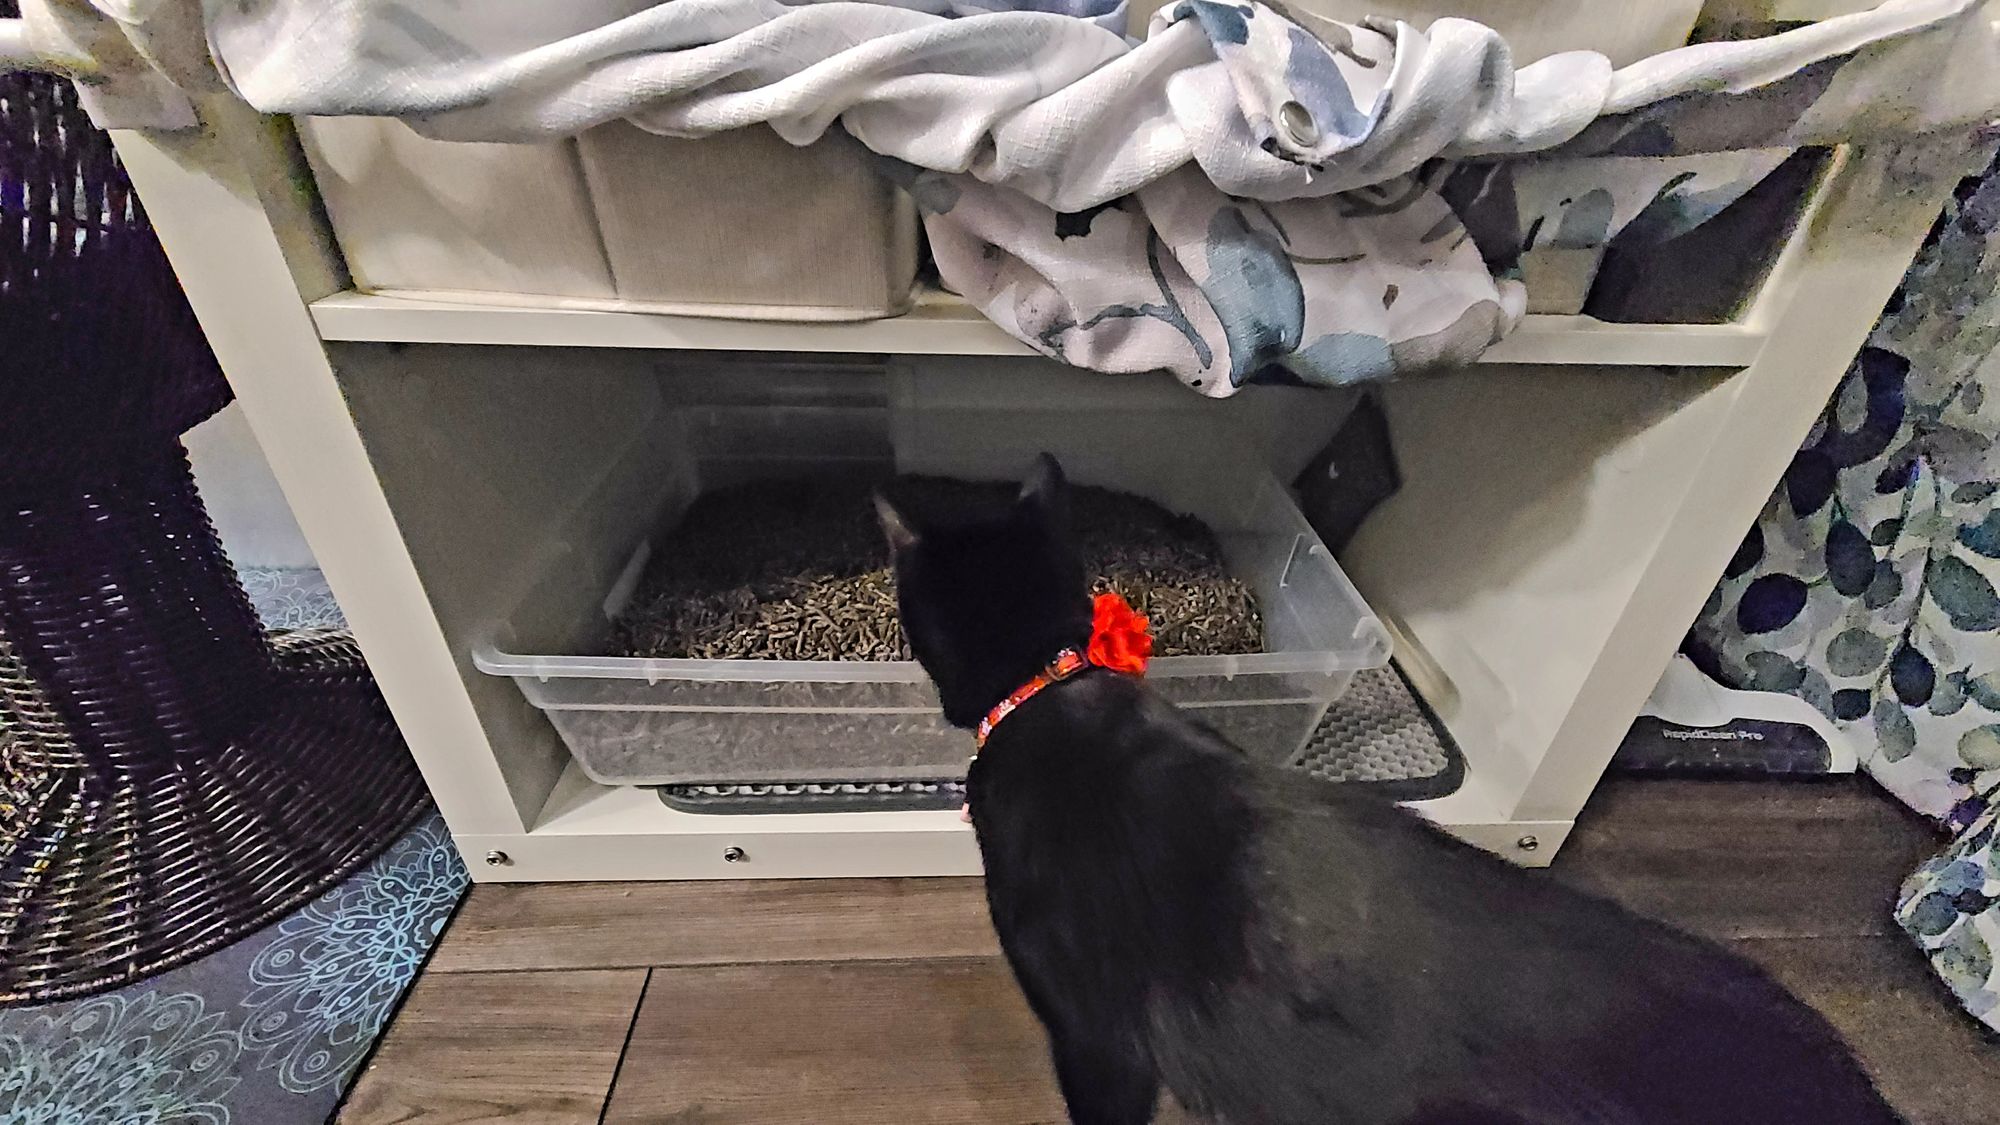
This was a project that we started early on, well before we picked up our RV. We wanted to give our cat Lily ample time to get used to using her litter box inside this cubby. I repurposed an old IKEA Kallax Shelving unit that we already had in our house. Our particular unit had drawers and cabinets, so I removed all of those and also took out the vertical partition that created the bottom cubbies. I left the partition in the top half, with plans to use those cubbies with storage baskets. Our dog Tanner likes to seek out "kitty candy" in the litter box, so we needed a way to keep him out, while still giving Lily space to get in. I came up with the idea to use a curtain with snaps, so that we could leave a little give in the fabric, but not enough for Tanner to stick his head in. It's not entirely Tanner-proof, so while we trained Lily to use the cubby, we also trained Tanner to stay away from it.
Though the general idea was easy to come up with, we made some detail changes along the way. Because we removed the divider in the bottom of the cubby, Anthony reinforced the remaining cubby shelves with L-brackets. We're not planning on putting anything heavy in the upper cubbies anyway, but this is just for extra precaution. When I was putting the curtain rod on the unit, I purposely put it higher than usual, so that it's actually obstructing the top cubbies. This is so the curtain rod will catch the cubby baskets and keep them from falling out when the RV is in motion. Lastly, instead of using a litter box, we found a shallow Rubbermaid bin that's the perfect size for the litter cubby. We put it on an anti-slip litter-grabbing mat. Lily uses it like a pro, and the best part about it is, the bin has a lid. So on travel days, we simply have to just cover up the bin, snap the curtain shut, and be on our way.
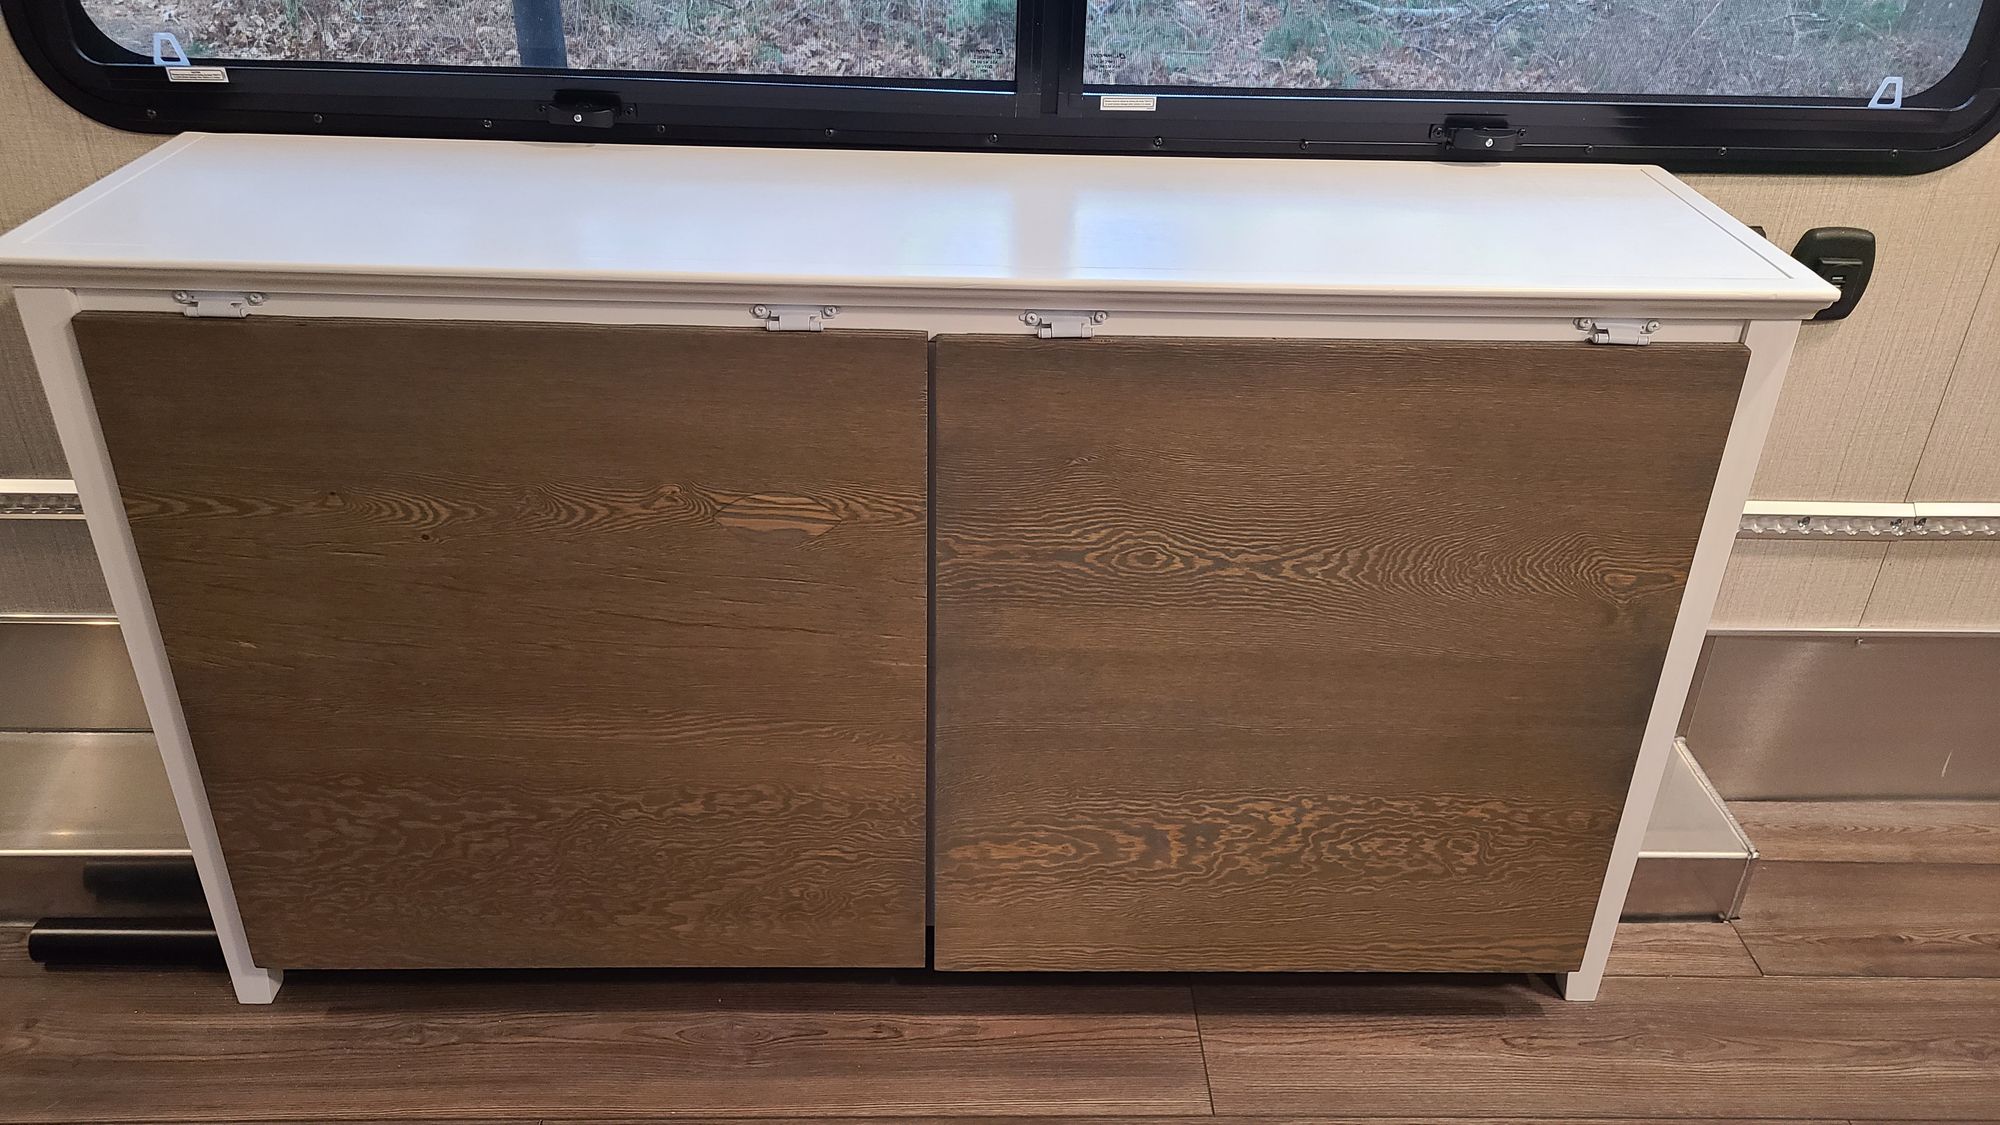
Workstation/Dining Table
I initially came up with the idea for a wheel well workstation from Ana White. She designed a unit that was long and thin, sat on the wheel well of a tiny house, and had dual-purpose cabinet doors/table tops. I immediately knew that would be perfect for our own tiny living situation. One major difference, however, was that our tiny home moves, and so sliding doors didn't make sense. We would need stationary doors that latch on the bottom when in closed position, and then lift up to create table tops in the up position. Our dimensions would also be slightly different.
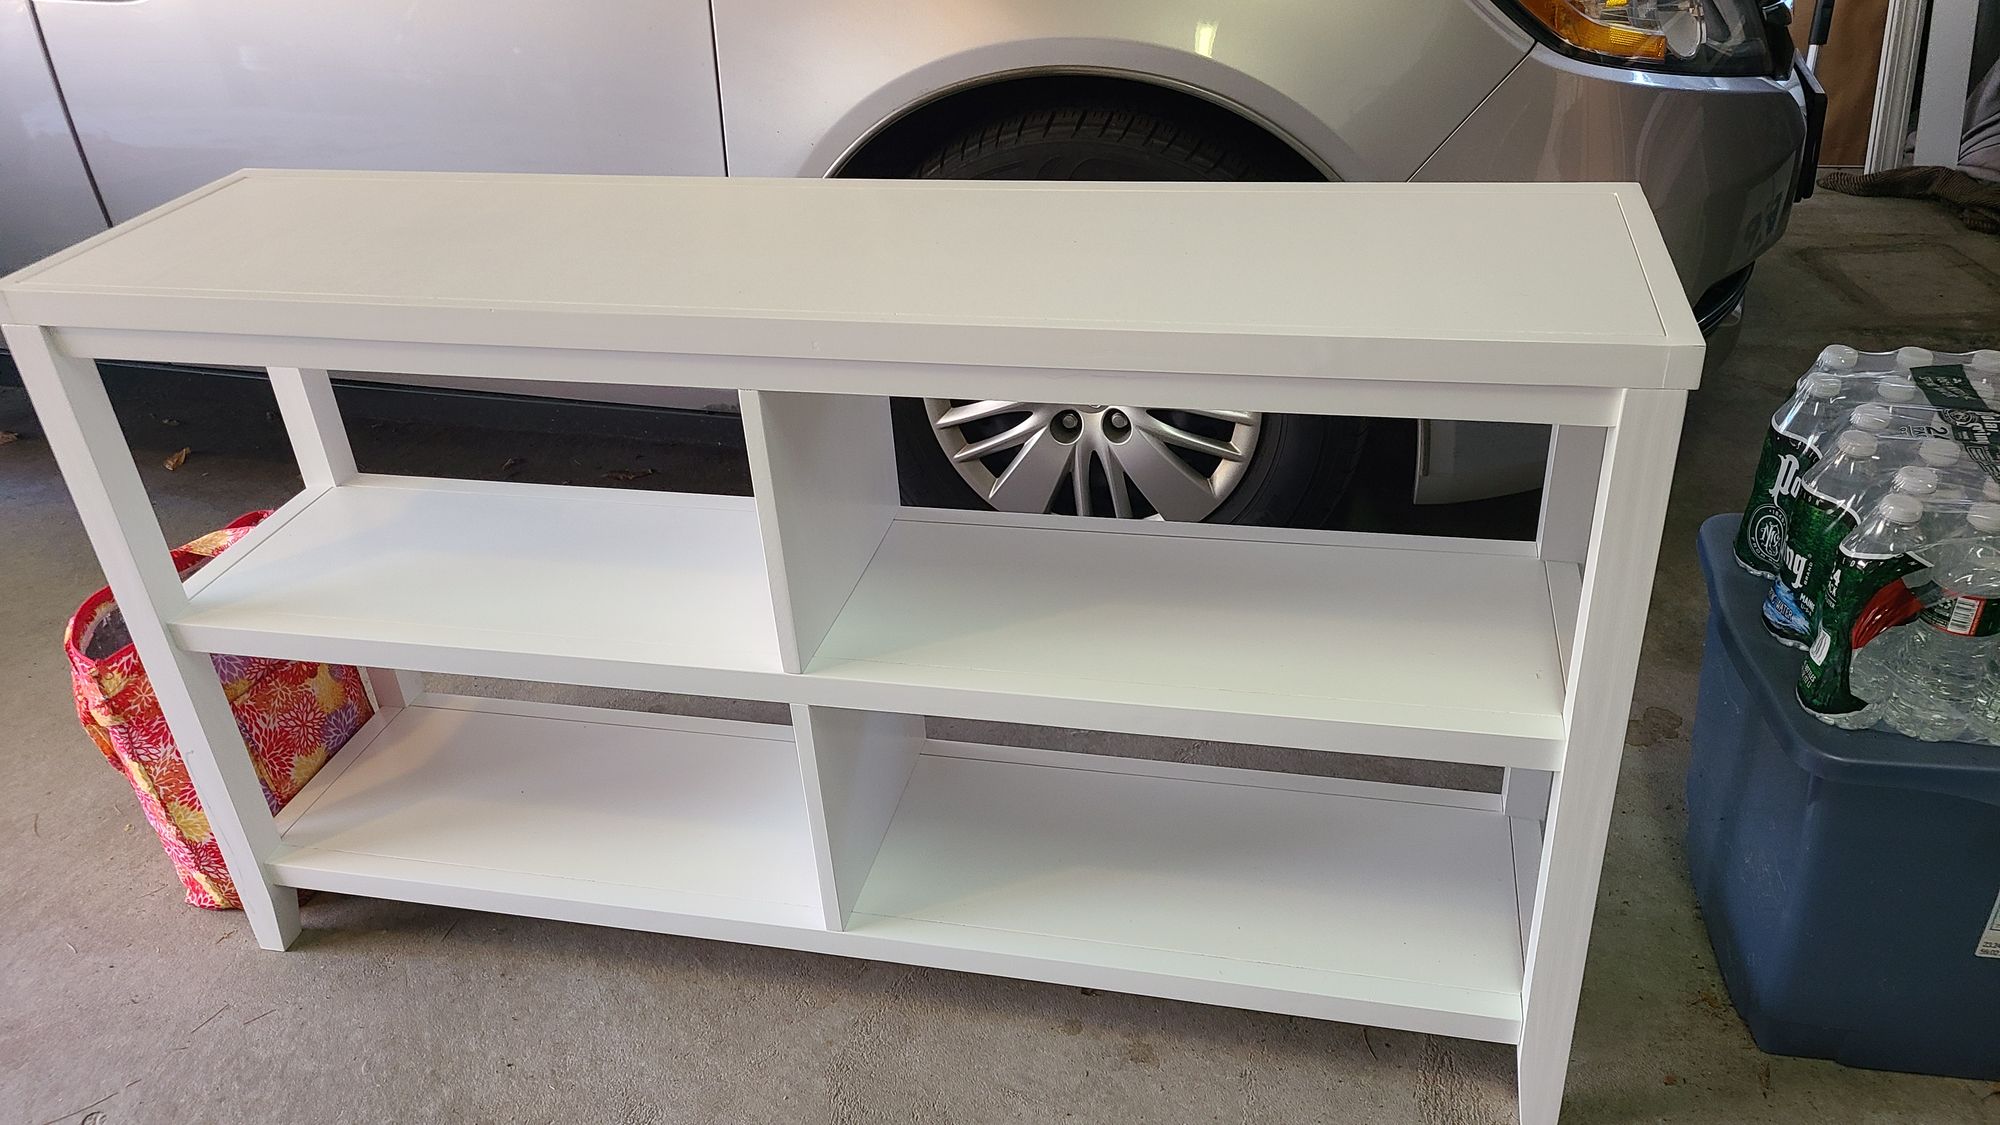
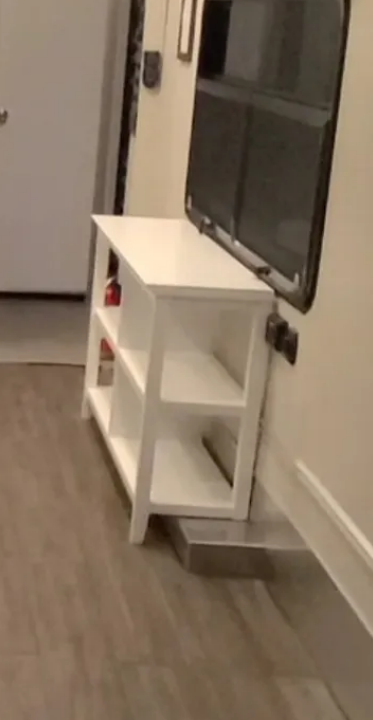
Originally the idea was to have my uncle help build us a unit from scratch, but we ended up running out of time. So, I decided to shop around for units that would be repurposed by adding front cabinet doors. I found a long, wide bookshelf that was relatively inexpensive and had perfect dimensions, all the way down to the height of the legs. In my head, I planned to saw down the back legs so that the unit would be flush with the wheel well. Then the front legs would reach the floor. I purchased the bookshelf, which was delivered pre-assembly. When I took the pieces out of the box, I was thrilled at how amazingly sturdy the unit seemed, and after I assembled it, I knew it would hold up to the extra weight we were planning on adding to it.
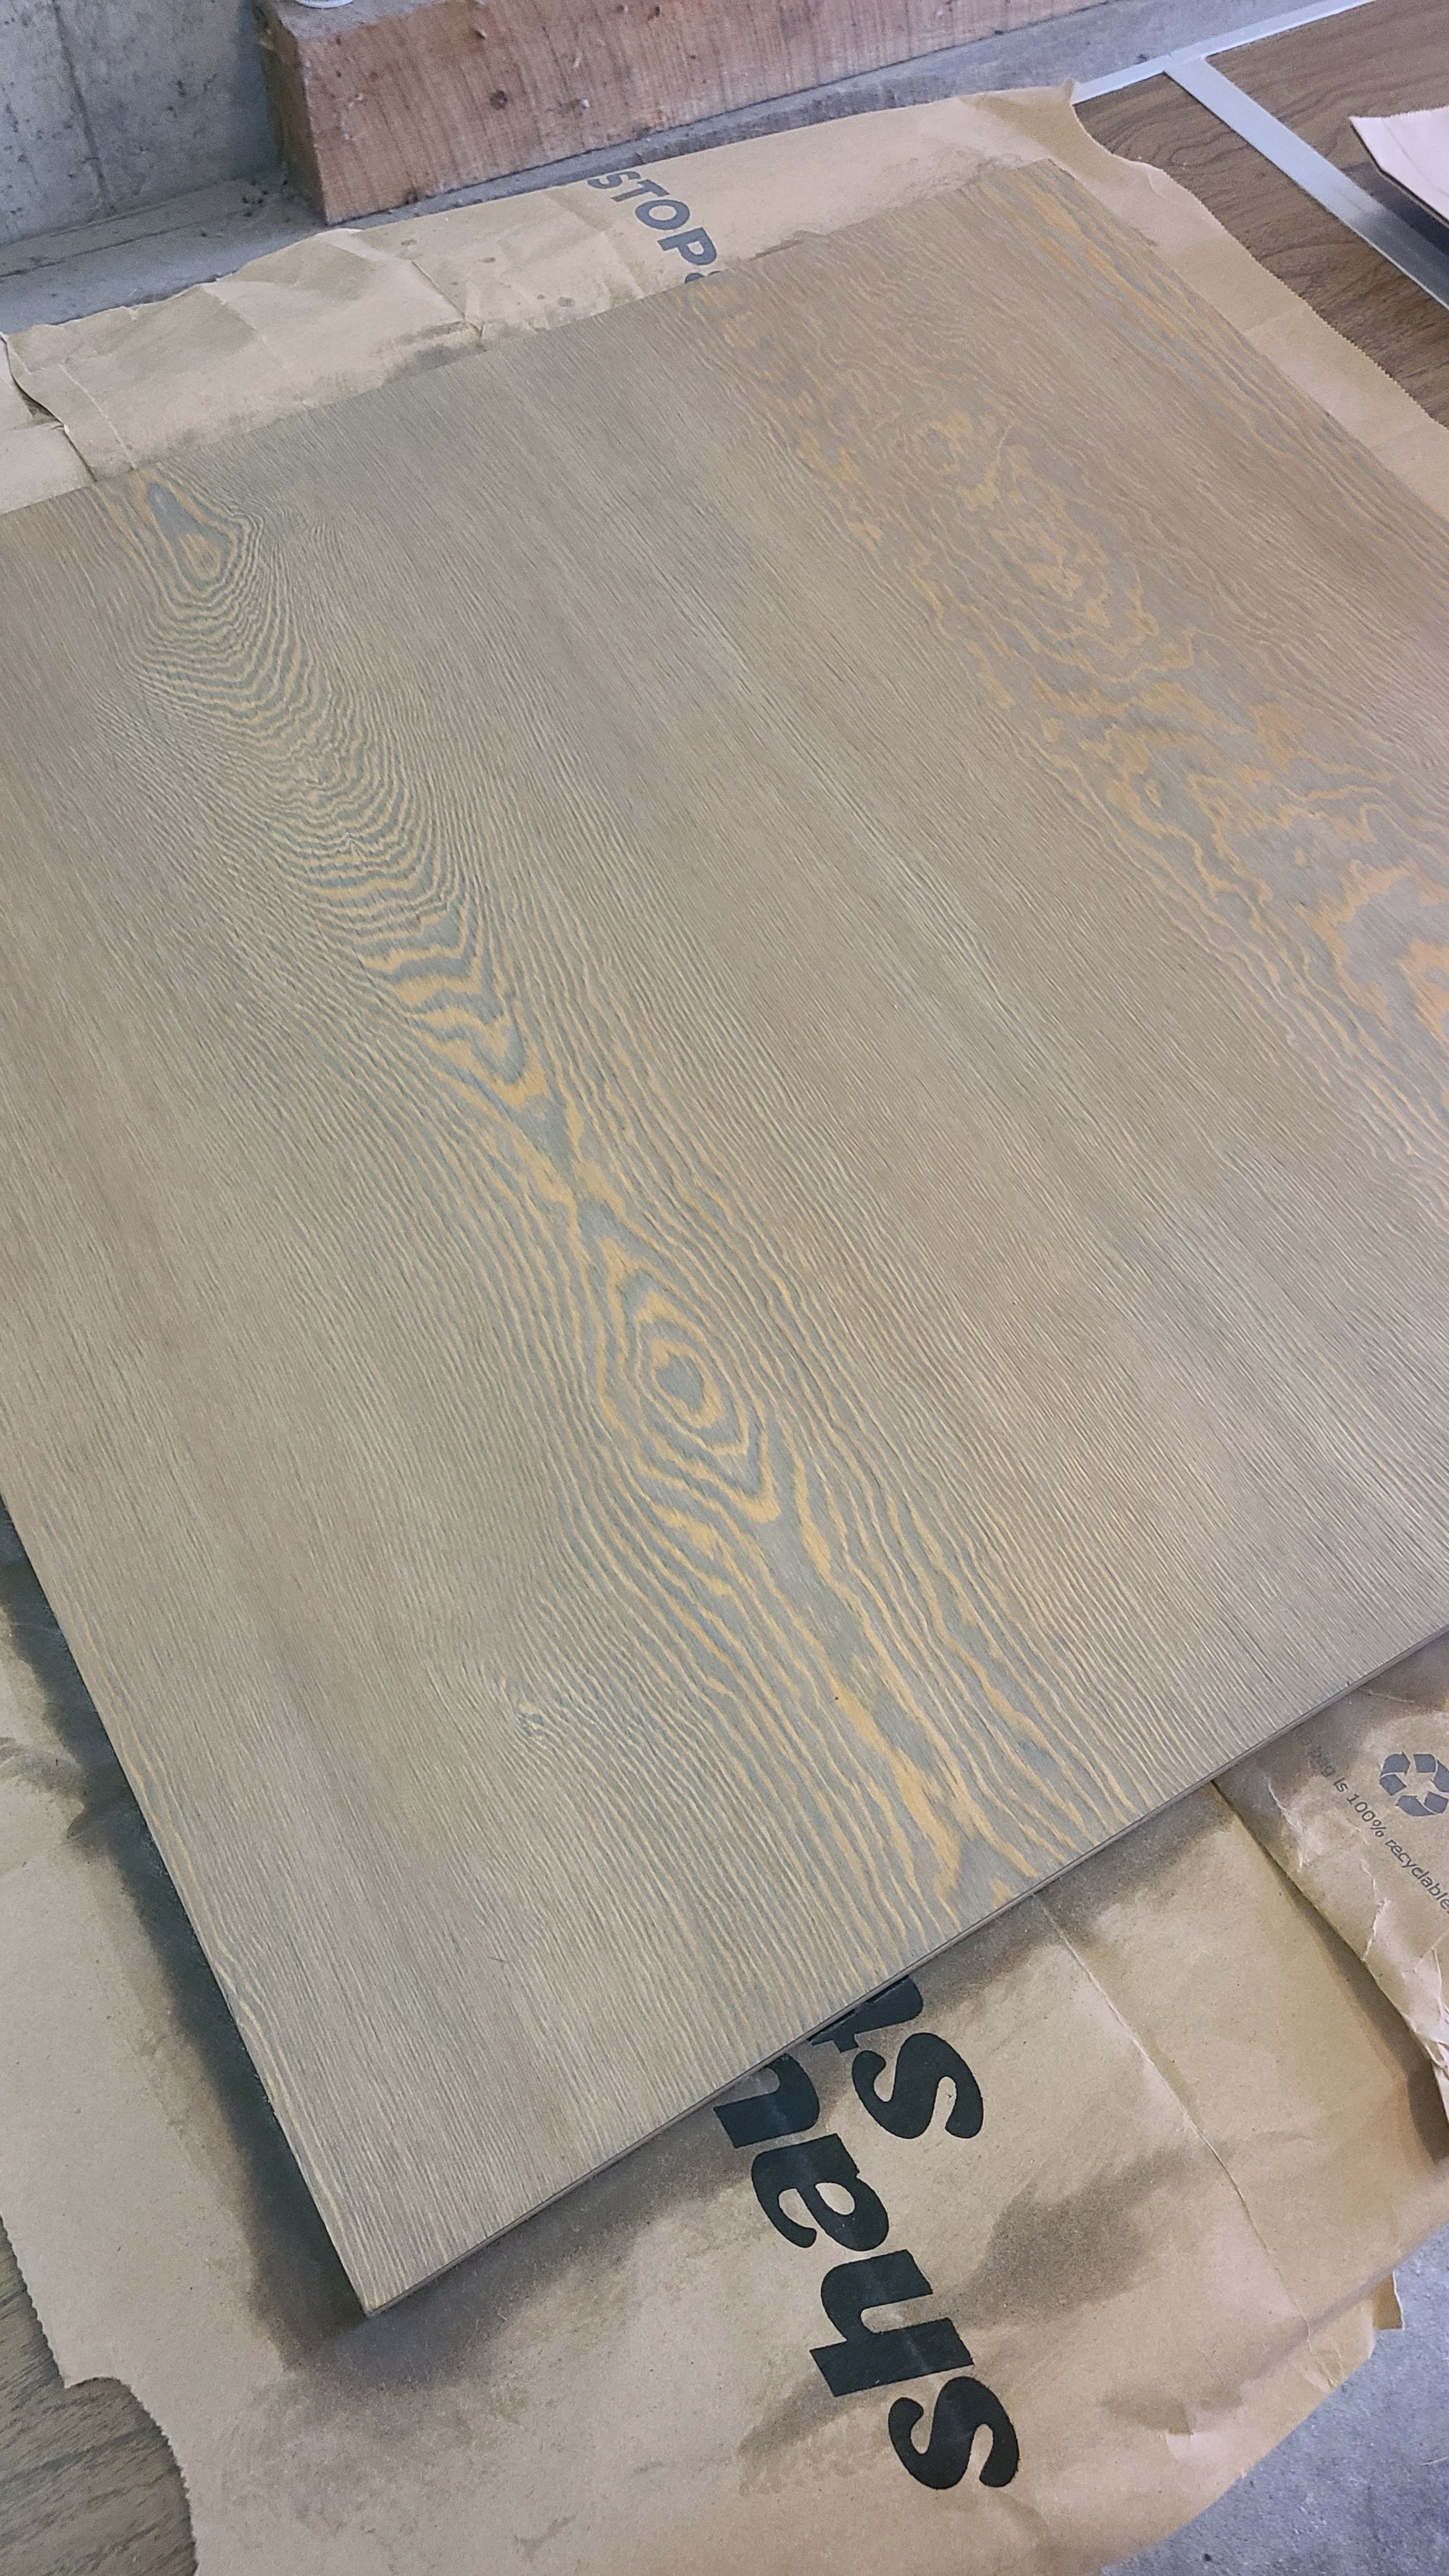
It wasn't easy finding good slabs of wood during a lumber shortage, but after a few stops to local hardware stores and lumber yards, we finally found our cabinet doors/table tops. We chose to stain the wood to give the workstation a two-toned look. We wanted to bring in more wood-grain aesthetics to soften the industrial look of the aluminum of the trailer. We chose a gray stain to complement our vinyl flooring.
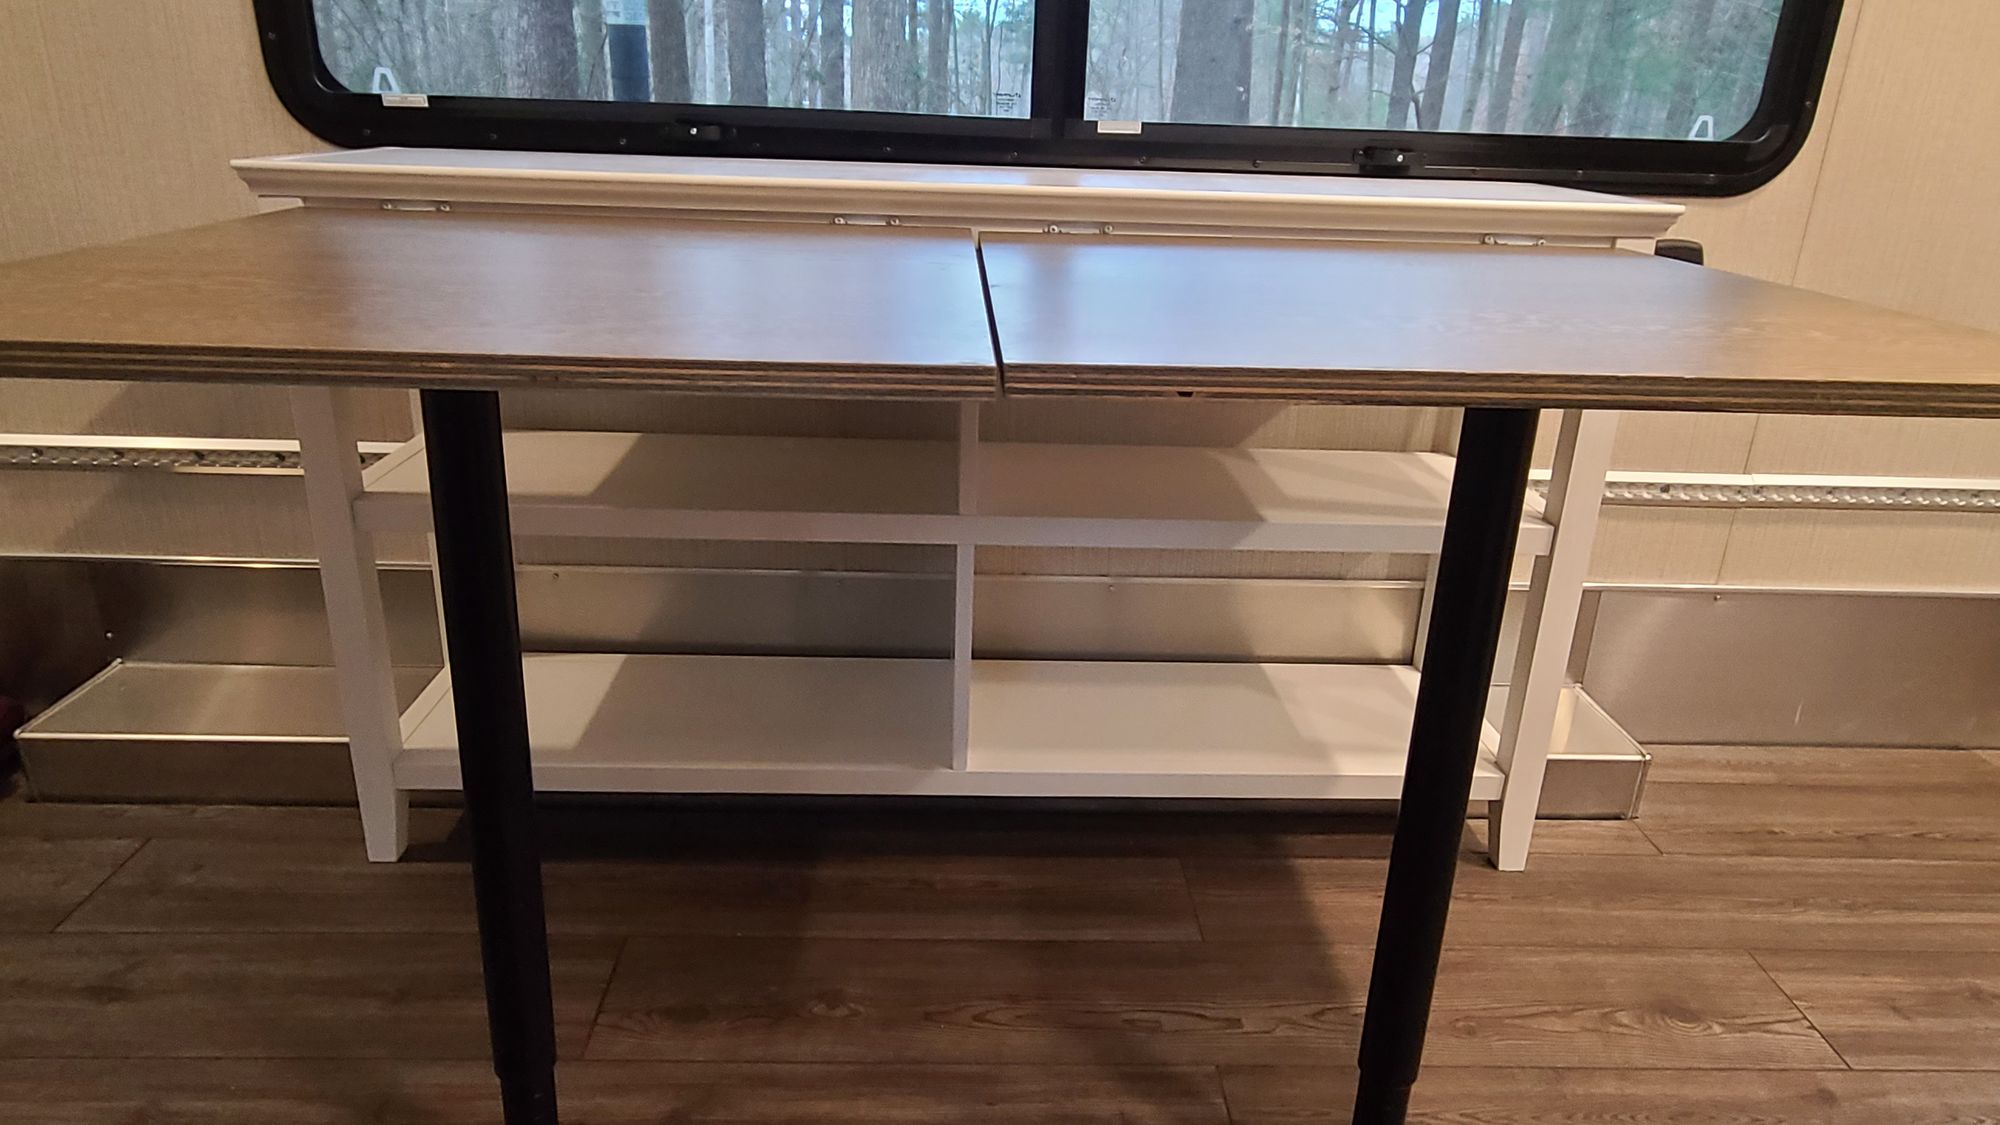
We debated for a while on how we wanted to attach the doors to the bookshelf. We had the option to use hinges, or to do a hook-and-eye configuration like Ana White's unit. We ended up going with hinges, deciding to put two per cabinet.
We already had adjustable IKEA table legs from an old desk in our house. These legs can be easily removed and reattached, as they attach by a plate instead of screwing directly into the wood. Once our wood was sanded, stained, and coated with polyurethane, we screwed the leg plates into each piece of wood. We ended up doing two leg plates per slab, just in case the ever think extra legs are needed to hold the weight of items on the tables. So far, though, the hinges seem to be plenty durable.
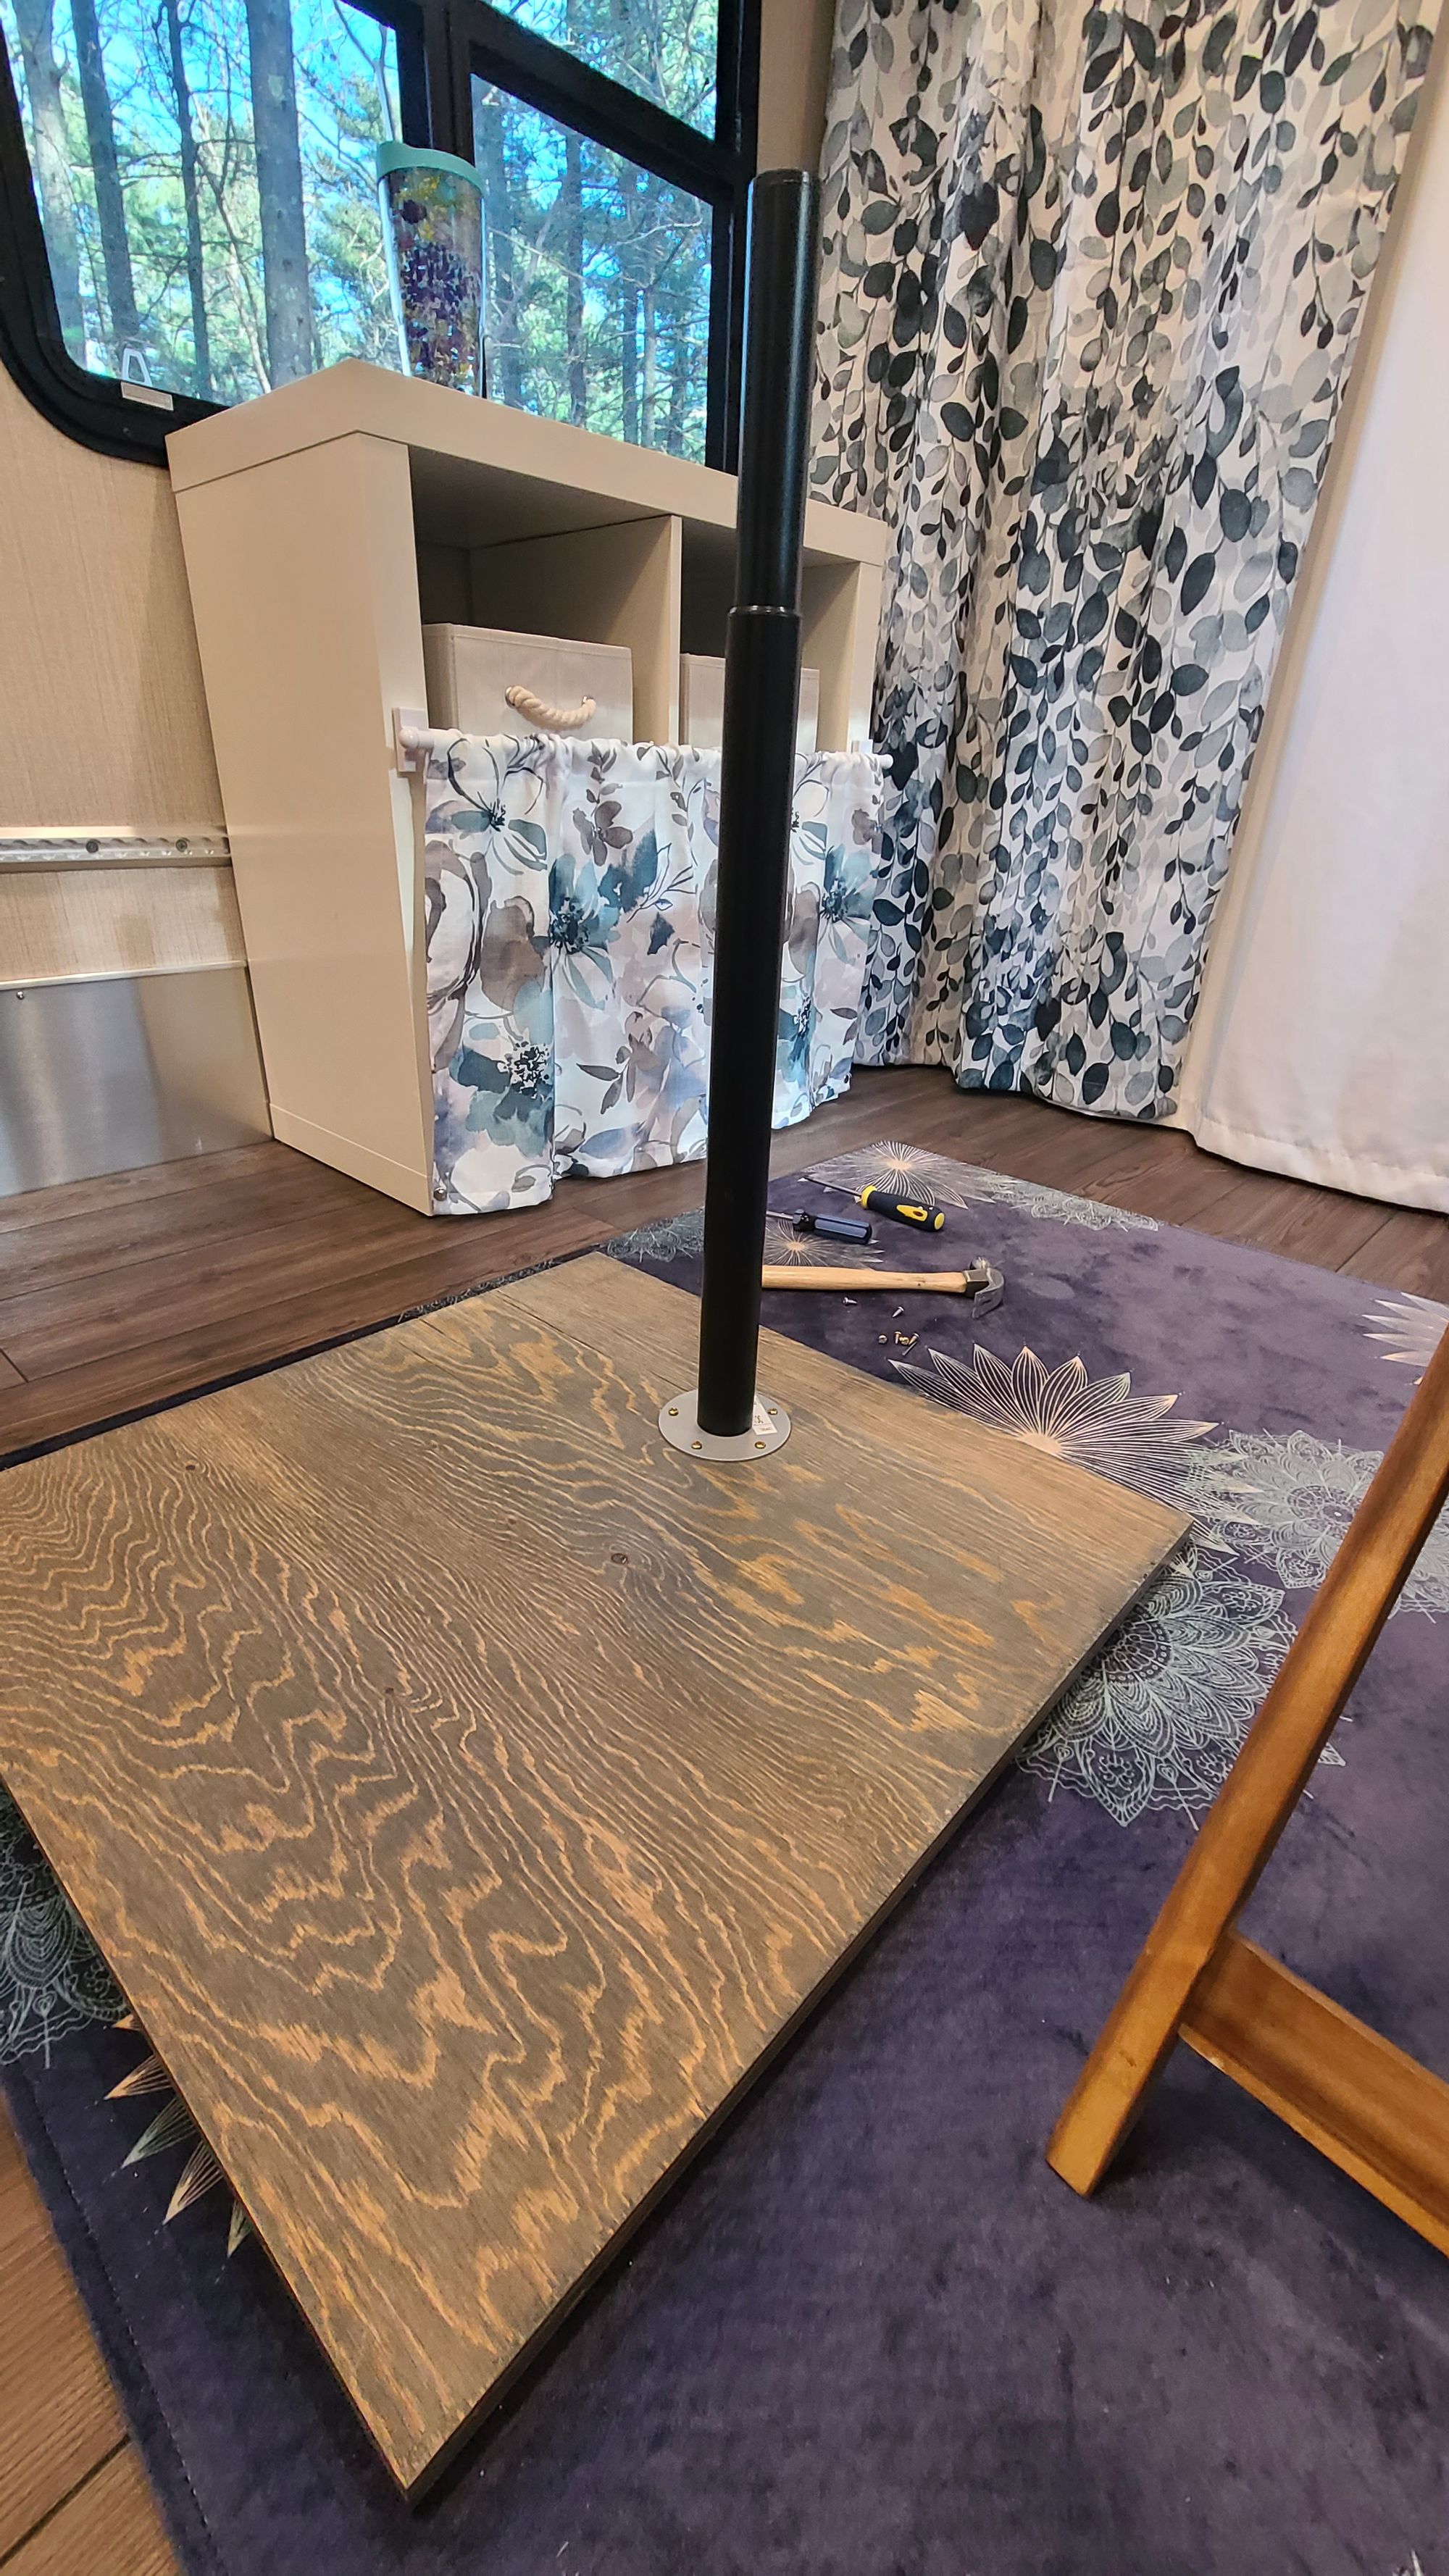
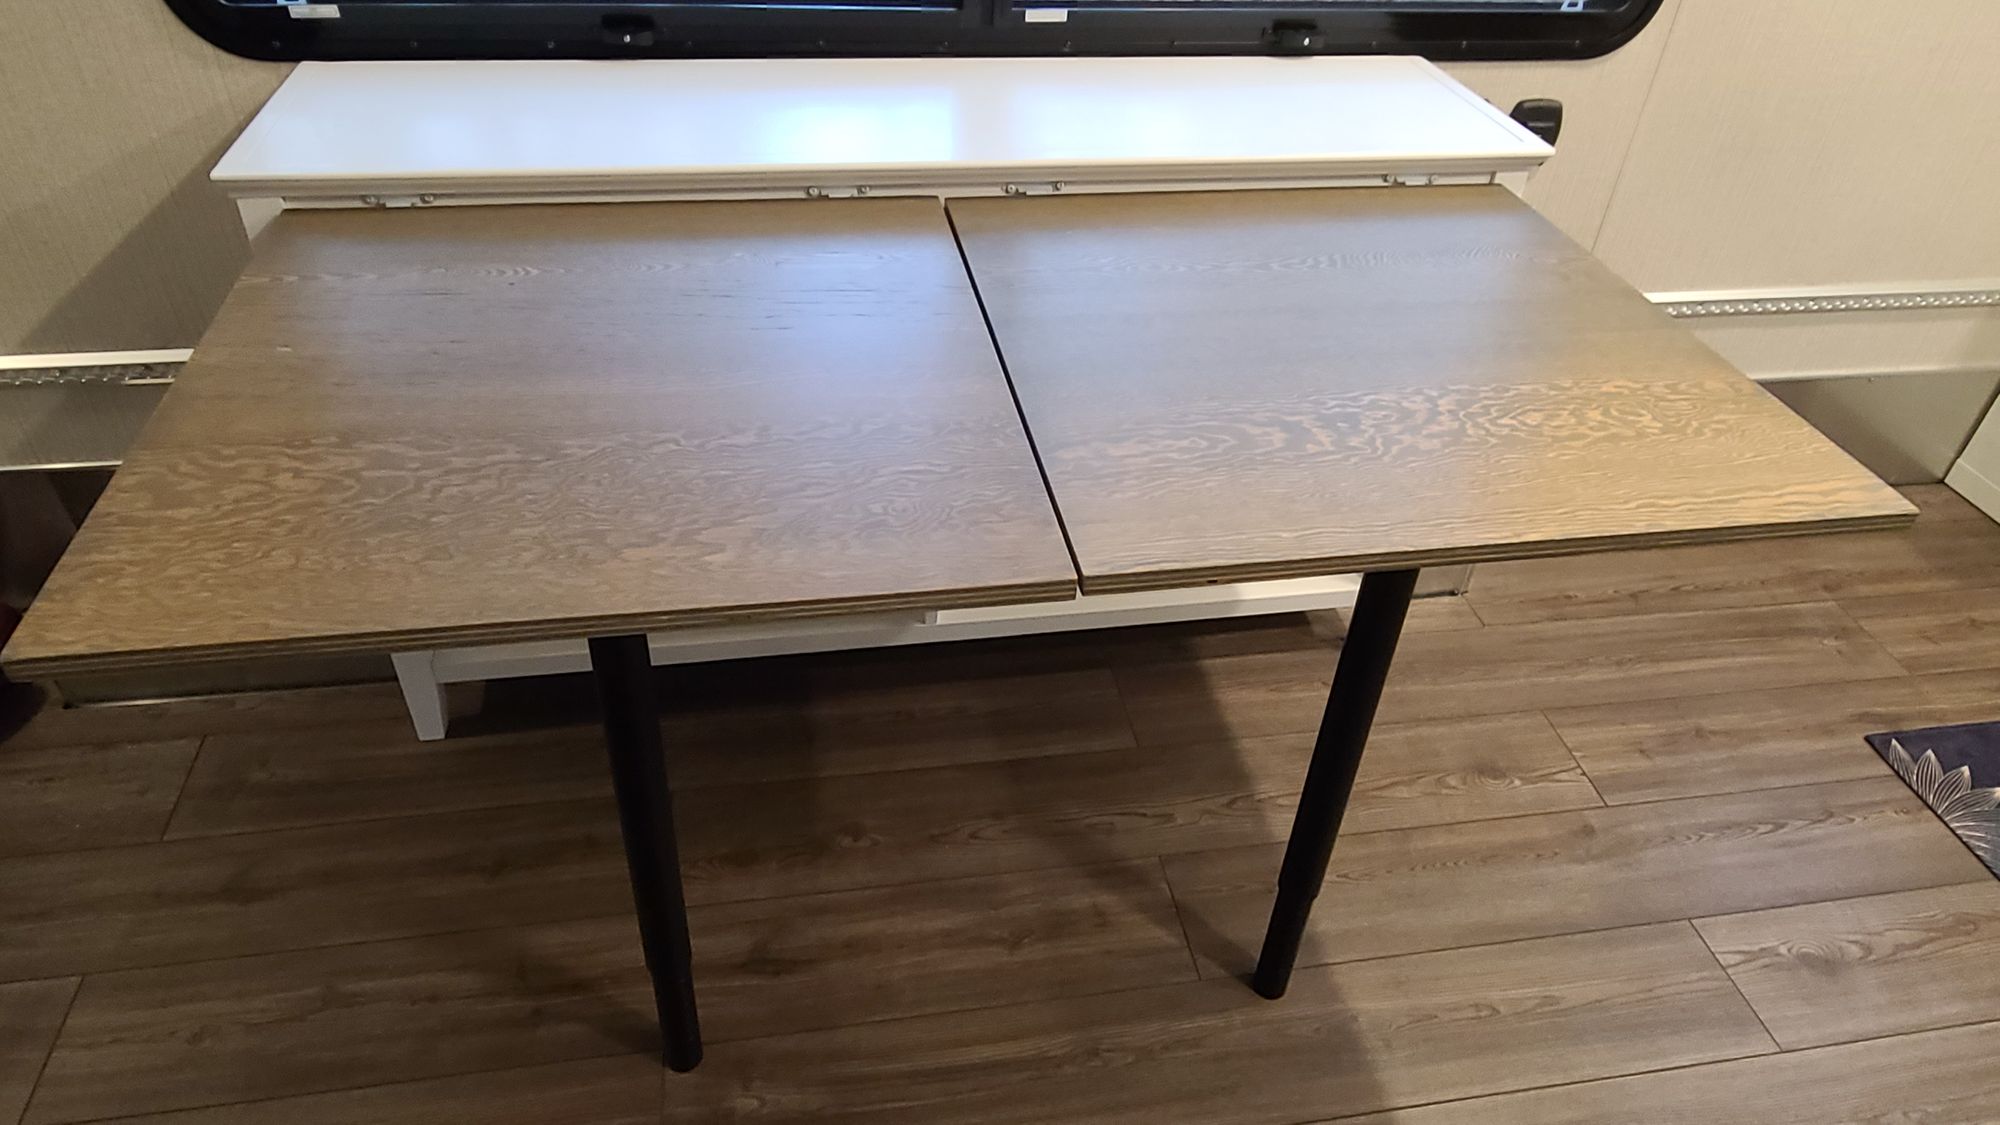
Technically, we could have just done one big piece of wood for the cabinet doors/table top. After all, the slab we got from the lumber yard was one piece, and they cut it into two for us. This was for good reason, though. Besides the fact that smaller wood pieces are easier to manage, we wanted the modularity that comes from two table tops. If one of us is working, we can lift our table up, but the other table can stay down, creating more room to walk around. If we are playing a board game and want to sit closer to each other, we can use one table and sit across from each other. Then of course, there's the obvious reason of weight. Two smaller pieces of wood are much easier to lift up and screw legs onto!
I know it's tough to understand exactly how this thing looks, so a picture is worth a thousand words!
Bookshelf before:
Bookshelf after back legs were sawed:
After:
Check out this video for a closer look at the litter cubby and workstation!
Getting these big projects done was a major win, as we made our way into our last month in MA before moving into the trailer. But, as is typical with RV Life, when one thing goes right, another goes wrong. With only weeks left before our launch date, we yet again ran into troubles with our transfer switch. We were also dealing with a malfunctioning inverter, leaving very few options for having power on the road. That problem needed to be addressed urgently. Then, to add to our challenges, our brand new hitch started rusting. The electric and hitch issues seem to be the gifts that keep on giving. Stay tuned for future posts to see how we make out with these issues, and with tackling our next big obstacle: Fitting all our stuff in 250 square feet of space!